
Guides Priest
Priest 90–99: healer builds
Contents
What a Priest at level 90–99 should wear, learn and slot. Two play styles — Attack + Crit and Attack + Penetration — and three modes: Abyss, League Trial and Secret Realm. Numbers come from the game data as checked on 13.10.2026; names are the ones used in the English version of the game. What the portal calculated is marked (calculated), what the data cannot confirm — (not verified), and what follows from reasoning rather than from the tables — (logic). The fight against the Alliance boss is called "League Trial" in the game (the name "League Expedition" also occurs).
Key points
- The Priest is a healer, and in the League Trial a Priest's points are counted by healing. Every Priest skill both heals and deals damage; the Mind Fire passive adds Hit Rating and Penetration to healing, so healing grows with the sum of Attack, Hit Rating, Penetration and Crit (calculated). Priest damage does not count towards the squad's points.
- At 90–99 the Priest plays Darkdream. It is the Core skill; the Dark Gate set, the Black Dream Scepter and the Shadow Fang Gauntlets all boost it. The Tactical and Ultimate slots hold Vampiric Touch and Revelation (logic).
- The effects of the scepter, gauntlets and set only work when the node of the skill is learned (Darkdream; otherwise the items give stats only). Names are doubled: the Russian version calls the set "Тёмный Портал" and its items "Тёмные Врата" (in English both are Dark Gate); the same goes for "Воля смерти" and "Желание смерти" (both Death Wish).
- For healing, percentage refinement lines are worth three to five times a flat one, while the flat Attack, Hit Rating, Penetration and Crit lines are equal to each other (calculated). Stable Victory is a percentage of Hit Rating, not a victory. A Penetration gem does not fit into the weapon; at 90–99 gems go up to level 9.
- The Life Connection specialization is not about damage: it strengthens healing of the linked target (usually the tank), tops it up and cuts large hits. In the League Trial five nodes out of eight do nothing (by the client code of 23.09.2026; not verified on the 13.10 version).
- Night Shadow Leopard is not in the data: there is no such pet in this version of the game.
Equipment
There are no level 99 items in the game. Items come in steps, and by the end of the range you wear the best that exists:
| Slot | Weapon | Gloves | Cloak | Shoulder pads | Chestplate | Legguards | Ring | Necklace | Bracers | Mark |
|---|---|---|---|---|---|---|---|---|---|---|
| Item level | 96 | 96 | 90 | 90 | 92 | 92 | 94 | 94 | 98 | 98 |
Scepter and gauntlets
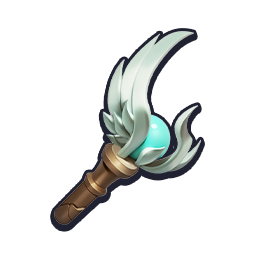 Black Dream Scepter (Lv. 96): Darkdream damage +60%, healing +40%, enemy attack in the area −6%; Core skill cooldown −15%.
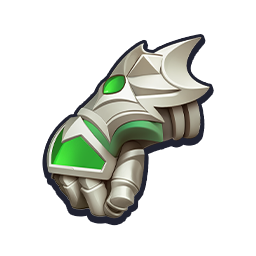 Shadow Fang Gauntlets (Lv. 96): after a Tactical skill, the damage and healing of the next Darkdream are increased by 180%.
The other Lv. 96 scepters and gauntlets boost other skills, not Darkdream: Dark Whisper Scepter and Shadow Pressure Gauntlets — Shadow Empowerment (the same Core slot, another branch), 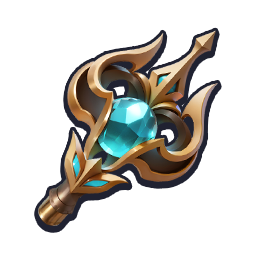 Holy Arrival Scepter and
 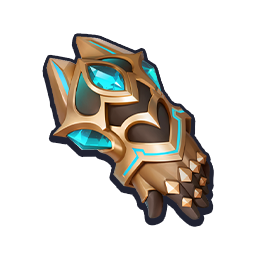 Pilgrimage Gauntlets — Holy Collapse, Holy Blessing Scepter and Holy Pilgrim Gauntlets — Holy Spread (these two pairs cut Tactical cooldown by 15%, and the gauntlets trigger after the Core skill with a 4.5 s recovery). The base stats of all Lv. 96 scepters are the same (Attack 1,312), and so are those of all gauntlets.
Set: cloak, shoulder pads, chestplate, legguards
Wear Dark Gate. It boosts the same Darkdream as the scepter and gauntlets.
 Cloak ·
  Shoulder pads ·
 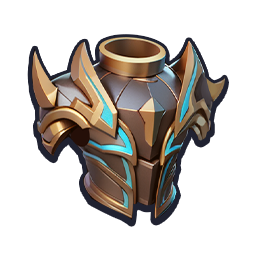 Chestplate ·
  Legguards
- 2 pieces — +2.5% Combat Attack Boost, Core skill cooldown −15%;
- 4 pieces — Shadow Empowerment and Darkdream: damage and healing +120%.
The Russian version calls the set "Тёмный Портал" and the items "Тёмные Врата" ("Dark Gate Cloak" and so on); in English both are Dark Gate. It is the same set. The 4 pieces turn on when the node of Shadow Empowerment or Darkdream is learned.
Death Wish and the tactical set. Death Wish gives Holy Collapse and Holy Spread +110% damage and healing; two pieces give +1.5% Combat Crit Boost and Tactical cooldown −15%; its items are called "Желание смерти" in the Russian version:
 Cloak ·
  Shoulder pads ·
  Chestplate ·
  Legguards
Together with the Holy Arrival Scepter and the Pilgrimage Gauntlets it makes a complete set for Holy Collapse (in the Tactical slot instead of Vampiric Touch): all three items are switched on by the Holy Collapse node. Whether it beats Dark Gate the data cannot measure — a Priest's League Trial points are counted by healing, and how bonuses of different items combine (added or multiplied) is not recorded in the data ❔ (logic, not verified). The main choice for every mode is Dark Gate.
Accessories
Each slot has one or two effects to choose from. Which is better depends on your build.
| Slot | Main choice | Replacement |
|---|---|---|
 Ring, 94 Ring, 94 |
Colossus Shard: shield dealt +6%, healing +5% | Fate Thread: +5 energy every 5 s |
 Necklace, 94 Necklace, 94 |
Winter Night Rose: after the Ultimate skill, healing +9% and damage taken −9% for 10 s | — |
 Bracers, 98 Bracers, 98 |
Blood Kiss: a basic attack that hits heals the ally with the lowest HP | Pack Leader: after a pet skill, 8% of the energy spent is returned |
 Mark, 98 Mark, 98 |
Holy Praise: restores 5% HP every 10 s; above 30% HP a healing bonus of +5%, below it damage taken −5% | — |
Accessory effects heal on their own or give a healing bonus rather than add stats, so they are not part of the refinement calculation; Fate Thread suits a Priest short of energy, Pack Leader — frequent use of pet skills (logic).
Gems, special effects, refinement
| Slot | Gem | Special effects (calculated order, best on the left; * = crit build only) | Refinement |
|---|---|---|---|
 Weapon, 96 Weapon, 96 |
 Crit Crit |
 Courage Blessing, Courage Blessing,  Unyielding, Sharpness, Unyielding, Sharpness,  Accuracy Accuracy |
Attack Bonus, Penetration Bonus, Attack |
 Gloves, 96 Gloves, 96 |
Crit /  Penetration Penetration |
 Boom Boom Boom Boom!, Courage Blessing, Sharpness, Luck Boom Boom Boom Boom!, Courage Blessing, Sharpness, Luck |
Crit Bonus, Hit Bonus, Crit |
 Cloak, 90 Cloak, 90 |
 Evasion Evasion |
Courage Blessing, Stable Victory, Penetration, Sharpness |
Attack Bonus, Penetration, Attack |
 Shoulder pads, 90 Shoulder pads, 90 |
 Attack Attack |
Boom Boom Boom Boom!*, Courage Blessing, Penetration, Sharpness |
Attack Bonus, Penetration, Attack |
 Chestplate, 92 Chestplate, 92 |
Evasion |
Courage Blessing, Unyielding, Sharpness, Luck* |
Attack Bonus, Penetration Bonus, Crit |
 Legguards, 92 Legguards, 92 |
 HP HP |
Boom Boom Boom Boom!, Unyielding, Penetration, Luck |
Crit Bonus, Crit, Penetration |
| Ring, 94 |
Crit / Penetration |
Courage Blessing, Stable Victory, Penetration, Sharpness |
Hit Bonus, Attack Bonus, Penetration |
| Necklace, 94 |
Crit / Penetration |
Courage Blessing, Unyielding, Sharpness, Accuracy |
Attack Bonus, Penetration Bonus, Attack |
| Bracers, 98 |
Evasion |
Boom Boom Boom Boom!*, Courage Blessing, Penetration, Sharpness |
Crit Bonus, Attack Bonus, Penetration |
| Mark, 98 |
Evasion |
Courage Blessing, Unyielding, Sharpness, Luck* |
Attack Bonus, Penetration Bonus, Crit |
- "Attack" is a flat amount, "Attack Bonus" is a percentage (the same for Crit, Penetration and Hit Rating). "Damage Bonus" and "Damage Reduction" do not affect healing; there is no "Healing Bonus" among the refinement lines.
- The Refinement column is one for both styles: the make-up of the lines is the same. Flat lines (Attack, Hit Rating, Penetration, Crit) are equal to each other — if a slot offers several, take whichever rolled (calculated).
- Every line of the Refinement column belongs to the set of possible lines of its slot; the game has two such sets and the server decides which one applies to you ❔.
- In the Gem column: crit / penetration; a Penetration gem does not fit into the weapon, so it takes Crit in both styles. For healing all offensive gems are equal.
- Four special effects only appear on Golden Flashing items, a regular Mythic item has two or three — pick them from left to right. Which effect can roll on which slot the data does not say ❔.
- On bracers, Boom Boom Boom Boom! (+17% Crit on items 90–98) is better than Boom Boom! (+6.8%).
- Defensive gems do not change healing (calculated); Evasion and Health are equal by the game's survivability formula: 272.2 points of Evasion = 117,036 Health.
Refinement, special effects and gems recalculated with the game formulas (calculated)
Refinement lines, special effects and gems are recalculated with the game's healing formula (the client's CalCulateHealing, tools/theorycraft.py in the portal) on the data of 13.10.2026; the game is rebalanced weekly (calculated). Healing = (Attack + Hit Rating + Penetration) × (1 + crit chance), crit chance = Crit / (Attack + Hit Rating + Penetration): while Crit is below the sum of the other three (about 28% of it for the typical base), this is simply the sum of Attack, Hit Rating, Penetration and Crit, and excess Crit is lost. The target does not take part in the formula, so there are no Hit Rating or Crit thresholds as for damage. Hit Rating and Penetration reach healing through the Mind Fire passive (the Priest has it from the first rank). The base is typical: the shape of the "live mage" from the portal tests (Attack 29,480, Crit 14,123.5, Hit Rating 7,882.1, Penetration 12,936), there are no real Priest builds (not verified); shifting any single stat by ±50% does not change the best triples. In the Penetration build three Crit gems (gloves, ring, necklace) are swapped for Penetration gems. A line is taken at its expected roll value (normal stone 35/40/20/5% at levels 9–12, advanced 30/50/20% at 11–13); target triples are compared, the gap to the best triple of a different make-up is 2.3…3.0 pp.
- Percentage lines against flat ones. A percentage refinement line is worth 3.4…5.0 flat ones: Crit Bonus gives the most, then Hit Bonus, Attack Bonus and Penetration Bonus. So every slot takes as many percentage lines as it offers, and flat lines fill the rest (calculated).
- Special effects. The "Special effects" column is in the calculated order (best on the left): the percentage effects Boom Boom Boom Boom!, Courage Blessing, Stable Victory and Unyielding rank above the flat Sharpness, Accuracy, Luck and Penetration; Boom Boom Boom Boom! is ahead of the rest, and the order of the next three depends on whether you have more Attack, Hit Rating or Penetration (calculated).
- Gems. The four offensive gems (Attack, Penetration, Hit Rating, Crit) are worth the same for healing: +0.42% per gem (calculated). The model was not tested in combat, each slot is calculated separately from the other nine (not verified).
Skills and passives
Which skills to take
Max out each of the four branches: the skill, Skill Enhancement and the top of the branch; with the root that is 10 points, 40 in total. Another 9 go into the three passive rows and 1 into Priest Stat. 50 out of 50 in total. The roots of a slot's branches are mutually exclusive (the light or the dark branch), and inside a branch the two skills are mutually exclusive too.
| Slot | Skill (all three modes; the dark branch in every slot is logic) |
|---|---|
| Basic |  Enhanced Spike Enhanced Spike |
| Core |  Darkdream Darkdream |
| Tactical |  Vampiric Touch Vampiric Touch |
| Ultimate |  Revelation Revelation |
- Core skill — Darkdream. The scepter, gauntlets and four pieces of Dark Gate boost exactly it: Void Butterflies hit enemies, raise the effectiveness of healing and reduce the attack of enemies in the area. Next to it in the slot is
 Shadow Empowerment (the set boosts it too, but it needs different gear, and the branches are mutually exclusive).
 - Basic skill — Enhanced Spike. Every third use is replaced by Mind Break with higher damage and healing. At the maximum level its average damage and healing per use and those of
 Blinding Spike are almost equal (260 and 260 damage, 46 and 47 healing) (calculated from the action tables, raw units); the artifact boosts Enhanced Spike specifically (logic).
  Holyfire applies a burn,
  Power Word · Shield gives a shield instead of healing.
 - Tactical skill — Vampiric Touch. A continuous life drain from enemies and several waves of healing bolts to all allies. It needs neither the scepter nor the set, and the gauntlets trigger after any Tactical skill, so the slot is free; of the dark skills it hits and heals continuously (logic). Other options of the slot:
 Shadow Barrage (one volley of stronger bolts to all allies),
  Holy Collapse (a wave out and back that heals everyone it touches) and
  Holy Spread (five waves in a row). All four have a 13 s cooldown; the options were not compared in combat ❔.
 - Ultimate skill — Revelation. Several scattered Ancient God Statues heal allies in a large radius and hit enemies with darkness. Options of the slot:
 Enter Darkness (the statue gives allies a Veil, healing comes later),
  Afterglow (the glow lights nearby units 20 times) and
  Heavenhost (after the light, allies get periodic healing). All have a 21 s cooldown (logic).
Passives: Priest Awakening T4–T6
| Row | Bonus 1 (3 points) | Bonus 2 (3 points) | Attack + Crit | Attack + Penetration |
|---|---|---|---|---|
| IV | +7.5% Combat Attack Boost | +11.7% Combat Crit Boost | Bonus 2 | Bonus 1 |
| V | after the Core skill, +11.25% Attack Bonus and +6.75% Crit Bonus for 10 s, cooldown 15 s | the same after a Tactical skill | Bonus 1 | Bonus 1 |
| VI | +5% Combat Attack Boost | +7.8% Combat Crit Boost | Bonus 2 | Bonus 1 |
The three bottom rows of Talent: in each you pick one node, Bonus 1 or Bonus 2 (that is what the game calls them), and a row takes 3 points. Rows are unlocked by class promotion, not by level: Priest T4, T5 and T6, the condition is Inscription Rating 1,000, 2,500 and 7,000.
- In T4 and T6 Bonus 1 gives Combat Attack Boost and Bonus 2 gives Combat Crit Boost. The bonus is a percentage of its own stat, so the Crit node (11.7% / 7.8%) beats the Attack node (7.5% / 5%) only if your Crit is above 64% of your Attack (7.5 : 11.7 = 5 : 7.8) (calculated). If your Crit is above that threshold (as intended in "Attack + Crit"), take Bonus 2; if it is below (in "Attack + Penetration" Crit is lower), take Bonus 1 (logic).
- In row T5 Bonus 2 gives the same after a Tactical skill. The Core skill is used three times as often (4.3 s against 13 s cooldown), and the passive itself has a 15 s cooldown: the Core skill meets it every time, the Tactical skill (13 s) every other time, so take Bonus 1 (calculated).
- The last point of the 50 goes into Priest Stat: node 2 (+1.5% Crit Bonus per point) beats node 1 (+0.5% Attack Bonus) while Crit is above a third of Attack (calculated), so take node 2 in both styles. Nodes 3 and 4 give Defense Bonus +1% and Evasion Bonus +1.5% per point.
Inscriptions
Inscriptions are put on in the  Runes menu. The main inscription is listed first; how many slots you have open depends on class promotion (not verified for the Priest).
 Abyss and
  League Trial
| Option | Main | Aux 1 | Aux 2 | Aux 3 | Aux 4 |
|---|---|---|---|---|---|
| Devotion |  Devotion Edict Devotion Edict |
 Unswerving Vow Unswerving Vow |
 Patient Vow Patient Vow |
 Pain Suppression Pain Suppression |
 Vigil Vow Vigil Vow |
All Priest inscriptions give a healing bonus (not damage). Devotion Edict is a constant bonus of 7.5…15%, the other four are constant bonuses: Unswerving Vow (3.6%), Patient Vow and Pain Suppression (3.2% each), Vigil Vow (3%); in total, with full stars, +28% healing bonus (calculated). The game's own Balance preset takes Oathbreak Trial instead of Vigil Vow — the bonuses are equal (both 3%).
One set for both modes: in the League Trial a Priest's points are counted by total healing and the server rating by average healing per second, so a steady bonus is needed, not bursts (logic).
 Secret Realm
| Option | Main | Aux 1 | Aux 2 | Aux 3 | Aux 4 |
|---|---|---|---|---|---|
| Humility: mobs, 10 s |  Humility Edict Humility Edict |
 Marching Vow Marching Vow |
 Diligence Vow Diligence Vow |
 Scourge Trial Scourge Trial |
 Burden Trial Burden Trial |
| Humility: boss, 3 s | Humility Edict |
 Pilgrim Vow Pilgrim Vow |
Diligence Vow |
 Shadow Dispersal Shadow Dispersal |
 Affliction Trial Affliction Trial |
In a short fight Humility Edict pays off if it triggers early. It lasts 20 s (healing bonus +44.4…88.8%), then a 60 s pause with a penalty of −4.8…−9.6%; the first trigger is at the 30th second, but the auxiliary inscriptions move it. The "Humility: mobs, 10 s" set triggers at the 10th second, "Humility: boss, 3 s" at the 3rd (calculated; whether the initial cooldown has a lower limit the data does not say). The game's own Extreme Speed preset (Humility, Scourge Trial, Pilgrim Vow, Diligence Vow, Burden Trial) triggers at the 6th second. Over the whole 80 s cycle Humility averages 15%, the same as Devotion Edict at maximum: the only gain is that the peak falls into the fight (calculated).
When Humility Edict triggers
Without fields, Humility Edict first triggers at the 30th second of the fight. Fields move this time: percentages add up, and Marching Vow subtracts 5 seconds. The rule has not been verified by the client (not verified).
| Auxiliary inscriptions | Triggers at |
|---|---|
| no fields | 30 s |
| Marching Vow (−5 s) | 25 s |
| Pilgrim Vow (−30%) | 21 s |
| Diligence Vow (−50%) | 15 s |
| Marching Vow + Diligence Vow | 10 s |
| Pilgrim Vow + Diligence Vow (−80%) | 6 s |
| Pilgrim Vow + Diligence Vow + Shadow Dispersal | 3 s |
| Diligence Vow (−50%) + Patient Vow (+50%) — they cancel each other out | 30 s |
Specialization: Life Connection
Specialization opens at level 40. Every 10 s after the fight starts, the Priest tries to form a link with the ally who has the highest maximum health (in practice, the tank). While the link holds, healing from the Priest's skills on the linked target is 6% stronger. The link is permanent but breaks if the target is too far away: both lose 20% of max health. Only one Priest can link a given player (except in the League Trial). There are 20 points, one of them taken by the core; a node opens when the required number of points is spent (the core counts).
| Node | Max | After N points | What it does (values by level from the data) |
|---|---|---|---|
 Life Connection Life Connection |
1 | 0 | core: link with the ally of the highest max HP, healing on it +6% |
 Energy Infusion Energy Infusion |
5 | 5 | when the link is formed the target is healed at once (rate 50/75/100/125/150), then healed every 5 s |
 Life Sharing Life Sharing |
1 | 10 | if a single hit on the linked target exceeds 20% of its max HP, the Priest has a 25% chance to take 50% of the hit (once per 10 s, no more than 40% of own current HP) |
 Resonance Amplification Resonance Amplification |
5 | 15 | with exactly 4 linked targets speed +20%, damage of the Priest and linked targets +1/2/3/4/5% |
 Versatility Versatility |
3 | 6 | additional linked targets: 1/2/3 |
 Power Link Power Link |
3 | 1 | link break distance +20/35/50% |
 Link Protection Link Protection |
3 | 1 | max HP loss on a broken link cut from 20% to 15/10/0% |
 Link Enhancement Link Enhancement |
5 | 1 | healing on linked targets another +2/4/6/8/10% |
 Kinetic Buffer Kinetic Buffer |
5 | 12 | when Life Sharing triggers, the shared damage taken by the Priest is cut by 5/10/15/20/30% |
What the data does not say
- The objective. A healer has no "damage": only what lies in the tables and the client code is calculated. How much a percent of the tank's protection is worth against a percent of group damage and speed or the Priest's own losses is an assumption (logic); so the "best layout" is the best for this function, not provably the best.
- Whether boss hits reach 20% of the tank's max HP and how often: Life Sharing depends on it (in the League Trial without such hits it is useless).
- How often the link breaks (distances between players) and whether the loss of 20% max HP on a break is instant: Power Link and Link Protection depend on it.
- How many allies the Priest has in the Abyss and the Secret Realm: Resonance Amplification only works with exactly four linked targets, that is, in a group of five.
The model goes through all 8,392 valid layouts (of 10,208 that sum to 20 with the core) and for each calculates: the healing multiplier of the linked target, the healing of Energy Infusion, the cut of big hits by Life Sharing, the number of links, the "exactly four" condition of Resonance Amplification, link breaks and the Priest's own losses when damage is shared. The result is pp of gain in the linked tank's protection (plus group speed and damage, minus losses) relative to the "core only" layout; it is neither healing nor damage in game units, and modes cannot be compared (calculated; the unit is logic). The main layout of a mode is the robust one: in the worst of those cases it loses the least against the best layout for that case ("maximin"). The base optimum is the best layout under the base assumptions; under others it can be noticeably worse (calculated).
How it is calculated
Abyss: running through packs to the boss (60% of the time on the run, 200 s) and standing at the boss (200 s). League Trial: a step-by-step model of the tank's life, five Priests in the squad. Secret Realm: a tank holds the monsters, you can stand or move (60 s, the Priest and four companions). Durations, distances and the frequency of large hits are assumptions (logic).
The Priest in the League Trial
A squad of 20: 4 tanks (they enter in turn), 11 damage dealers and 5 Priests. By the game text, Priests and damage dealers are not attacked by monsters. The squad's pool of points grows with the squad's total damage, is divided between classes by the number of participants, and inside the Priest class by total healing done; damage dealt by Priests and tanks does not count towards the squad's points. The server rating of a healer is calculated by average healing per second and only if the boss is killed; the best healer of the Alliance for the day gets an Alliance red packet. Damage to mobs and the share of mobs in the skill area do not matter to a Priest: the specialization does not hit mobs, and mobs hardly hit the tank (logic).
Five nodes out of eight do nothing in the League Trial — by the client code of 23.09.2026; that code was not checked on the 13.10 version (not verified). The link is limited to one target there (Versatility gives nothing), does not break with distance (Power Link and Link Protection are not needed), Priests take no damage (Kinetic Buffer is not needed), Resonance Amplification needs four links, and Life Sharing triggers with a 100% chance. Several Priests can link the same tank. Three nodes work: Energy Infusion, Link Enhancement and Life Sharing. The other 8 points do not matter: the table has Link Protection 3 and Kinetic Buffer 5 — they start working if the Trial rules in the client turn out to be different (a fallback: Versatility 3 and Resonance Amplification 5 instead of them).
The Trial model calculates the boss strength the layout can stand with the tank living 200 s and its HP reserve at 15 s of the five Priests' total healing (calculated under assumptions): no nodes ×1.00, Link Enhancement 5 — ×1.07, Energy Infusion 5 — ×1.13, both — ×1.21, with Life Sharing — ×1.32. Life Sharing helps only if boss hits reach 20% of the tank's max HP ❔; one Priest with it takes half of a hit, two take all of it, so the point is needed by at least two Priests of the squad and optional for the rest (calculated).
Layouts by mode
In a cell: the points in the robust layout and, in brackets, in the base optimum (if they differ).
| Node | Max | League Trial |
Secret Realm, standing |
Secret Realm, moving |
Abyss, packs and boss |
|---|---|---|---|---|---|
| Life Connection |
1 | 1 | 1 | 1 | 1 |
| Energy Infusion |
5 | 5 | 5 | 5 | 5 |
| Life Sharing |
1 | 1 | 1 | 1 | 0 |
| Resonance Amplification |
5 | 0 | 5 (4) | 3 (2) | 3 |
| Versatility |
3 | 0 | 3 | 3 | 3 |
| Power Link |
3 | 0 | 1 | 3 | 0 |
| Link Protection |
3 | 3 | 0 | 0 | 3 |
| Link Enhancement |
5 | 5 | 4 (5) | 4 (5) | 5 |
| Kinetic Buffer |
5 | 5 | 0 | 0 | 0 |
| Total points | 20 | 20 | 20 | 20 |
In the worst of the cases checked for how the world behaves, the robust layouts give 86 to 100% of their scenario's optimum (on average 94–100%), the base optima in the worst case, including a change of the objective's weights, — 72 to 99% (calculated). The objective is an assumption, see above.
- Every mode has Energy Infusion 5 and Link Enhancement 4–5: without Infusion the optimum falls to 36–57%, without Link Enhancement to 66–78% (calculated).
- Life Sharing (1 point) is taken in the Secret Realm and against a boss: it cuts big hits on the tank. On the run through packs it is harmful (costs the Priest more than it protects), so the Abyss column does not have it.
- Versatility 3 and Resonance Amplification 2–5 are a package for groups: Resonance Amplification works with exactly four links (a group of five). In a group of four the node is dead, and the base layouts lose 0.6–2.7% because of it (calculated).
- Power Link and Link Protection matter only when the link breaks: Power Link 3 gives the most in the Secret Realm on the move (about +2.5%), elsewhere up to 1.4% (calculated).
- The boss phase of the Abyss is the most fragile place. The base optimum there is Life Sharing and Kinetic Buffer (Infusion 5, Life Sharing 1, Link Protection 3, Link Enhancement 5, Buffer 5); with the slightest rise in the weight of the Priest's own losses it loses almost everything (in the worst case 3% of the optimum remains), so the Abyss column shows the robust layout (Infusion 5, Resonance 3, Versatility 3, Link Protection 3, Link Enhancement 5, 73% in the worst case) (calculated).
- Fragile: whether the tank needs more healing at all (with a cap of +15% on useful healing the base optima lose 5–7%, 31% in the Abyss boss phase), the weight of the Priest's losses and the cost of a link break (logic). The best layouts of the other modes differ by less than 1%.
Magic stones
Stones come in six shapes: round shield, triangle, prism, tower shield, star, moon. The combination bonus turns on when the five slots hold stones of five shapes from one of the four combinations; only the shape matters. The Priest has four combinations, each with a star and a moon:
-
1) round shield, triangle, prism, star, moon → Life Connection - Enhanced: healing on the linked target another +5%
-
2) round shield, triangle, tower shield, star, moon → Energy Infusion - Enhanced: the Energy Infusion healing interval is 2 s shorter (5 → 3 s)
-
3) two triangles, tower shield, star, moon → Resonance Amplification - Enhanced: damage of the Priest and linked targets another +2% (with four links)
-
4) two round shields, prism, star, moon → Link Enhancement - Enhanced: healing on the linked target another +5%
-
A Rapid Strike set (combination 1):
 Swiftstrike Round Shield,
  Howler Triangle,
  Swiftstrike Prism, a star and a moon (any; for example Star of Sorrow and Moon of Tenacity): Rapid Strike 165, Wound Control 65, Rapid Strike Bonus 60% (calculated from level 3 stones).
 -
A Wound Control set (combination 1):
 Woundmaster Round Shield, Howler Triangle,
  Woundmaster Prism, a star and a moon: Wound Control 165, Rapid Strike 65, Wound Control Bonus 60% (calculated).
 -
Sets without a star and a moon do not turn a combination on (for example, "pure Rapid Strike": Swiftstrike Round Shield and Prism, Howler and Punisher Triangles, Standard Bearer Tower Shield — Rapid Strike 230, bonus 100%); these are just sets of stats.
Rapid Strike boosts damage, healing, shields and damage reduction of basic attacks and the Core skill (+1% per 30 points), Fierce Assault — of Tactical and Ultimate skills, Wound Control — of pet skills. The first set boosts the Priest's own skills, the second the healer pets; which gives more the data does not measure ❔ (not verified).
Which is stronger for healing is calculated by the specialization model (flow of healing on the linked target = (1 + Infusion healing / rotation) × (1 + 0.06 + 0.02 × Link Enhancement level); healing rotation about 1.66 coefficient/s by the action tables; Energy Infusion 5, Link Enhancement 5): combinations 1 and 4 add 5 pp to the multiplier (+4% to the flow), combination 2 cuts the Energy Infusion interval from 5 to 3 s, that is, raises its healing 1.67 times (+10% to the flow), combination 3 gives only +2% damage with four links. For healing combination 2 is stronger if Energy Infusion is maxed (calculated under the specialization's assumptions, not tested in combat; the stats of the stones themselves are not counted ❔).
Potentials. Class potentials work only with their own combination: Health Weave (1), Energy Torrent (2), Resonance Boost (3), Chain Energy Enhancement (4); each boosts the effect of its combination. Specialization Empowerment boosts Energy Infusion, Specialization Resonance boosts Life Connection, Resonance Amplification, Link Enhancement, Kinetic Buffer and the combination effects. It makes sense to take the potential of your combination and one of those two (logic); the potential numbers in the data are raw ❔.
Artifacts
Every artifact has small cells (offensive and defensive) and a central one for the core.
| Artifact | Cells (attack / defense) | Core |
|---|---|---|
 Lich's Phylactery (Lv. 64, basic skills) Lich's Phylactery (Lv. 64, basic skills) |
2 / 0 |  Lich's Bone - Revival Lich's Bone - Revival |
 Undying Bright Flame (Lv. 70, core skills) Undying Bright Flame (Lv. 70, core skills) |
2 / 2 |  Bright Flame Spark - Stability or Bright Flame Spark - Stability or  Bright Flame Spark - Overload Bright Flame Spark - Overload |
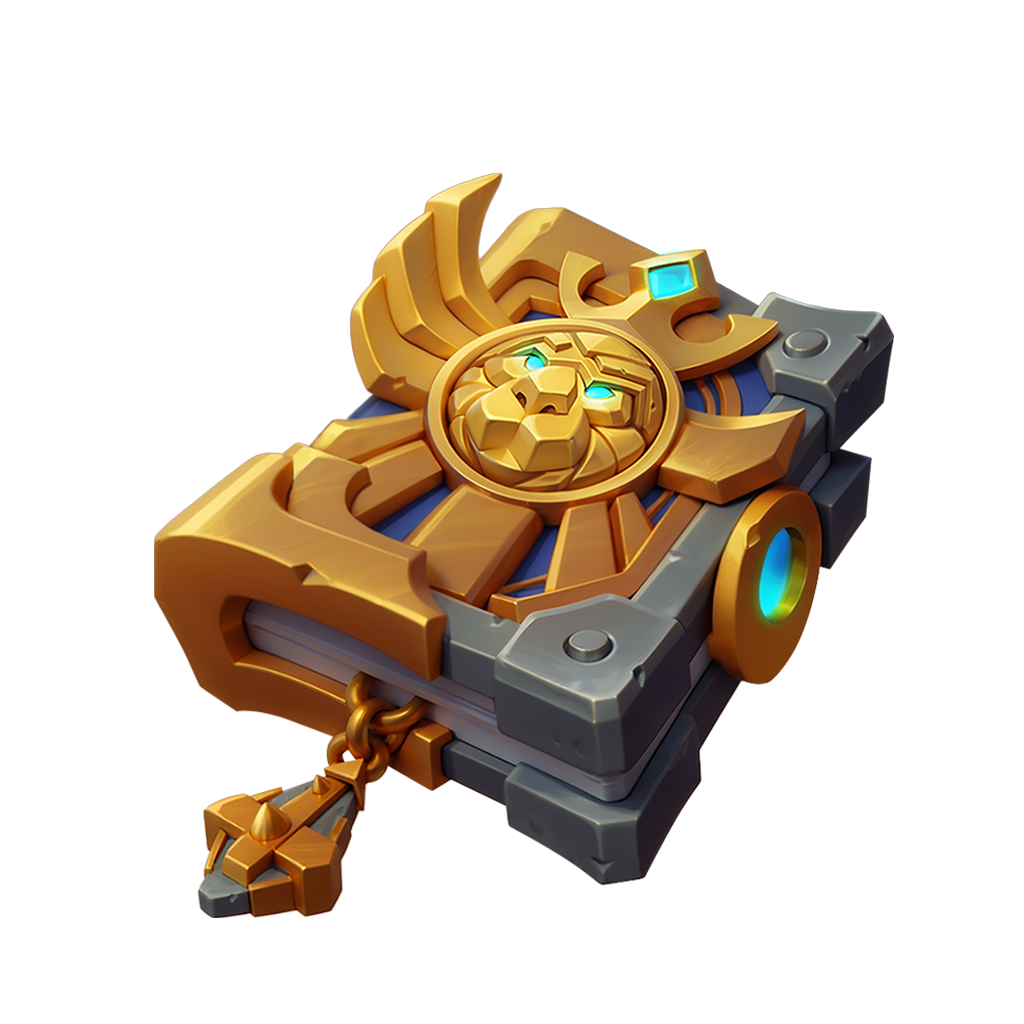 Book of Judgment (Lv. 74, tactical skills) Book of Judgment (Lv. 74, tactical skills) |
2 / 2 |  Doomsday Judgment - Judgment Doomsday Judgment - Judgment |
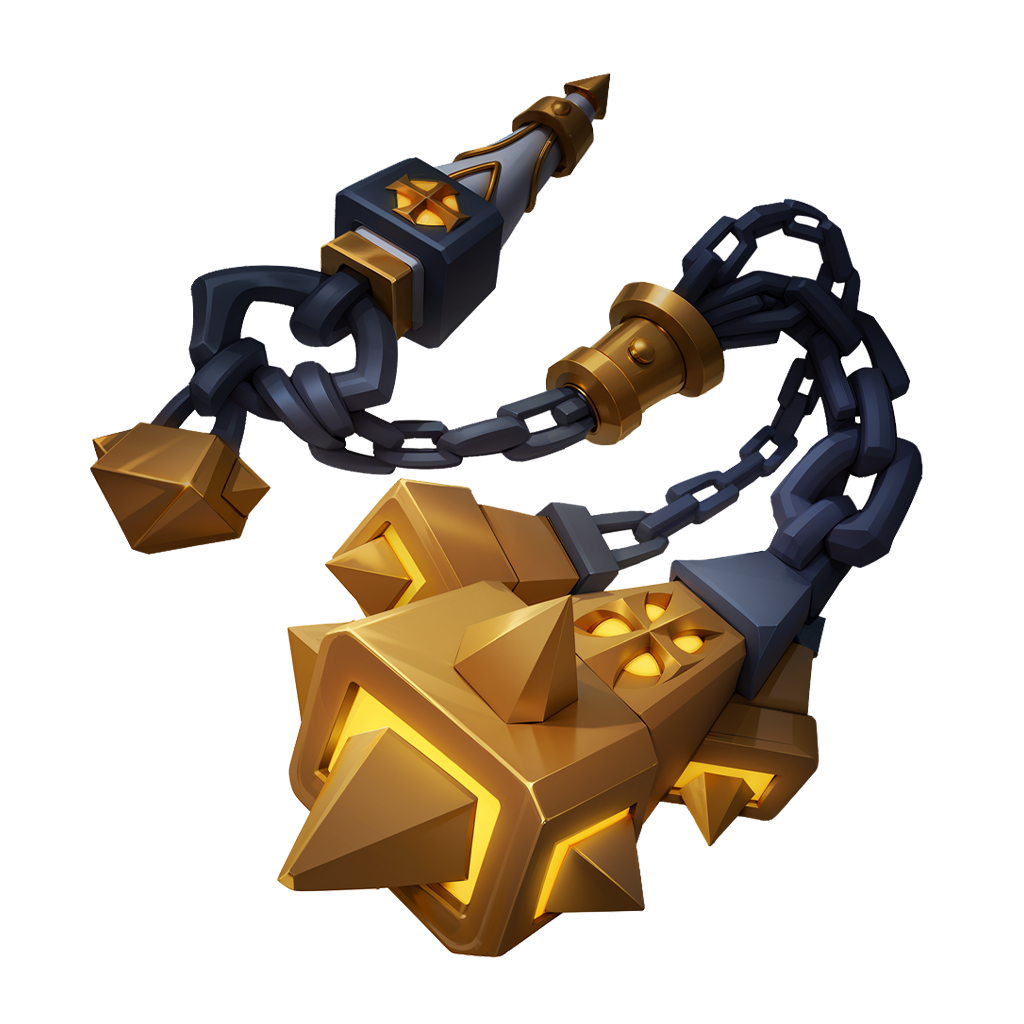 Penitent's Flail (Lv. 80, ultimate skills) Penitent's Flail (Lv. 80, ultimate skills) |
3 / 3 |  Silver Chain Flail - Prayer or Silver Chain Flail - Prayer or  Silver Chain Flail - Devotion Silver Chain Flail - Devotion |
An artifact boosts the skills of one slot: Lich's Phylactery (Lv. 64) — Basic, Undying Bright Flame (Lv. 70) — Core, Book of Judgment (Lv. 74) — Tactical, Penitent's Flail (Lv. 80) — Ultimate (this is how the skill nodes are laid out in the game tables). The core goes into the central cell. The cores are picked by their descriptions (logic):
- Revival: any skill has a 15% chance to apply burn, bleed, slow or paralysis to the target for 5 s and additionally heals the weakest ally. Other cores of the slot: Combo (after a Core and a Tactical skill a Basic skill may fire as well), Overload (healing of the weakest ally for damage dealt), Shield (an extra shield).
- Stability: when Basic and Core skills hit 5 or more targets, they additionally heal the weakest ally; Overload: the same with fewer than five targets (against a single boss this one fires). For Tactical and Ultimate skills there is a pair Endurance and Flicker with the same target-count condition.
- Judgment: after applying a debuff, if the target has two or more kinds of debuffs, there is a chance to cast the Ultimate skill at once, and the debuffs are removed. It pairs well with Revival: that core applies random debuffs to the target (logic). Other cores: Confession (a Basic skill boosts the next Ultimate), Conviction (a chance to cast the Ultimate at once for damage dealt), Absolution (healing units below 50% HP brings the Ultimate closer — directly from your play). The chances and thresholds in the data are raw ❔.
The fourth core — by mode:
- Prayer (where you can stand — League Trial and the Secret Realm): standing still for more than 3 s gives a damage and healing bonus of +8%, it disappears when you move (logic).
- Devotion (Abyss, where you run): every 12 skills used give +0.8% damage and healing until the end of the fight, up to 16 times (up to +12.8%).
Tying the fourth core to the modes is a recommendation (the cores have no mode in the data). Numbers are for top-quality cores, the other core numbers are raw (not verified). Small offensive nodes take the Power Nexus (Basic and Core skills) or the Strong Nexus (Tactical and Ultimate), defensive ones — the Stable Nexus and the Resolute Nexus. Among the forging properties look for Fierce Assault, Rapid Strike, Wound Control (basic) and Eternal Core (the core no longer loses durability) (what to take is not verified).
Skill nodes. A node works on the skill it was made for (the numbers depend on the node level): Enhanced Spike — an additional healing instance on Mind Break; Darkdream — the butterflies apply a burn, every burn heals an ally; Vampiric Touch — an extra hit (rate 504%) on a random enemy and healing of the weakest ally; Revelation — when a statue is summoned, a chance to heal the target additionally (rate 120%).
Pet emblems
Each of the three pets has its own slot shape: the first has triangles (△), the second hexagons (⬡), the third diamonds (◇). No more than two identical emblems per pet ("×2"); "Unique" means one copy. Numbers are for top-rank emblems (Bloodhunt, Bone Assassin, Heartstalk and Swamp Scorp only reach rank 4).
There are no layouts with three or more identical emblems here: the limit in the data is two, such layouts cannot be assembled. Whether the game enforces this limit strictly on the server the data does not say ❔.
Level 90 emblems appear on the server in waves: the first from day 83, the second from day 139 (there are no level 100 emblems). The main rows are for a server older than 139 days, on a younger one take "before day 139". The estimate is the portal's model: points of Attack, Crit, Hit Rating and Penetration are equal, percentages weigh differently; it was taken from a baseline character, not from the Priest, a 1–3% difference is not significant (calculated). Damage Bonus does not enter healing, so emblems with it give a Priest nothing.
Healing
The best valid layouts by the healing formula: all four point stats (Attack, Hit Rating, Penetration, Crit) and their bonuses; Damage Bonus is not counted.
| Pet | Emblem 1 | Emblem 2 | Emblem 3 | Emblem 4 | Emblem 5 | Total |
|---|---|---|---|---|---|---|
 First, after day 139 First, after day 139 |
 Shadow Cryptlord ×2 Shadow Cryptlord ×2 |
 Phantom Cryptlord ×2 Phantom Cryptlord ×2 |
 Stormkin Stormkin |
Attack Bonus 31.8%, Penetration Bonus 85.3%,  Crit RES 2200, Crit RES 2200,  Defense 2850 Defense 2850 |
||
| First, before day 139 |
Stormkin ×2 |
Shadow Cryptlord ×2 |
 Ogre Ogre |
Attack Bonus 42.5%, Penetration Bonus 43%, Crit RES 2850, Defense 1300 |
||
 Second, after day 139 Second, after day 139 |
 Rampaging Greendragon (Unique) Rampaging Greendragon (Unique) |
 Nightshade Tyrannosaur (Unique) Nightshade Tyrannosaur (Unique) |
 Shadow Broodmother ×2 Shadow Broodmother ×2 |
 Phantom Lavagiant Phantom Lavagiant |
Crit 1100, Penetration 1100, Attack Bonus 15.9%, Crit Bonus 85%, Penetration Bonus 63.8%,  Evasion 3300 Evasion 3300 |
|
| Second, before day 139 |
 Frenzied Tyrannosaur (Unique) Frenzied Tyrannosaur (Unique) |
 Fel Thunderlizard (Unique) Fel Thunderlizard (Unique) |
Rampaging Greendragon (Unique) |
Shadow Broodmother ×2 |
Attack 650, Crit 650, Penetration 1100, Attack Bonus 10.7%, Crit Bonus 42.5%, Penetration Bonus 85.3%, Evasion 2200 |
|
 Third, both eras Third, both eras |
 Bloodhunt ×2 Bloodhunt ×2 |
 Heartstalk ×2 Heartstalk ×2 |
 Shadow Statue Shadow Statue |
Hit Rating 1100, Hit Bonus 134%, Crit RES 2160, Defense Bonus 31.9% |
By the game's list of valued stats
For the Priest the game names Attack, Crit, Hit Rating and their bonuses as valued (Penetration and Penetration Bonus are not in the list). For ◇ the layout is the same as above.
| Pet | Emblem 1 | Emblem 2 | Emblem 3 | Emblem 4 | Emblem 5 | Total |
|---|---|---|---|---|---|---|
| First, both eras |
Ogre ×2 |
Shadow Cryptlord ×2 |
 Swamp Scorp Swamp Scorp |
Attack Bonus 62.8%, Crit RES 3500,  HP 283,800 HP 283,800 |
||
| Second, after day 139 |
Fel Thunderlizard (Unique) |
Rampaging Greendragon (Unique) |
Nightshade Tyrannosaur (Unique) |
Phantom Lavagiant ×2 |
Crit 1750, Penetration 1100, Attack Bonus 26.6%, Crit Bonus 127.5%, Evasion 2200 |
|
| Second, before day 139 |
 Bone Assassin (Unique) Bone Assassin (Unique) |
Fel Thunderlizard (Unique) |
Rampaging Greendragon (Unique) |
 Wind Sprite ×2 Wind Sprite ×2 |
Attack 420, Crit 650, Penetration 1100, Attack Bonus 17.9%, Crit Bonus 99.7%, Evasion 1300 |
Every rank step burns three copies of the previous rank, so one top-rank emblem takes nine root ones. League Trial emblems are hidden in the data, so they were not used as replacements.
Pets
The team has three pets. Night Shadow Leopard is not in this version of the game; another pet takes its place (logic).
- Abyss and League Trial:
 Lady,
Lady,  Light Howl,
  Morning Glory (or
  Spirit)
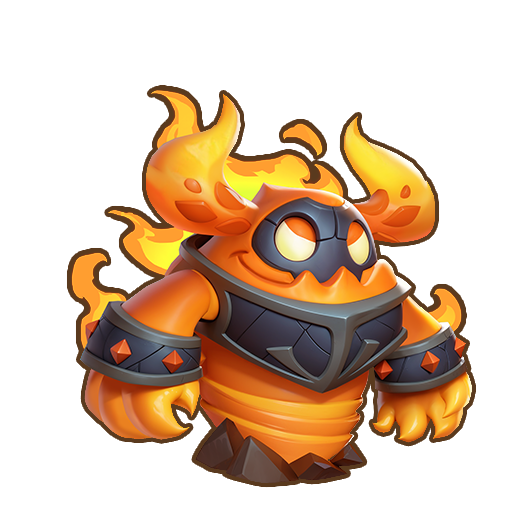
 - Secret Realm: Lady, Light Howl, Morning Glory; if you need damage to mobs, replace Morning Glory with
 Flame Demon (6★) or
  Meteor (logic)
Lady is the main healer: she heals the weakest group member 10 times and restores her own energy (at 6★ she also passes energy to an ally). Light Howl boosts the carrier's damage and healing for 7 s (10 s at 6★); on a new server it is free for the seven-day event (the reward for 420 points). Morning Glory heals the weakest member; Spirit puts a periodic heal on the three weakest (the whole group at 6★). Flame Demon at 6★ pulls enemies to the centre of the storm, Meteor strikes again on a crit. By the data Overlord and Soulclaw are defense pets (taunt), not a healing buff (not confirmed).
Badges
| Set | Badge 1 | Badge 2 | Badge 3 | Badge 4 | Badge 5 |
|---|---|---|---|---|---|
| Midnight Run (attack) |  Royalty Royalty |
 Shadow Blades Shadow Blades |
 Troll Empire Troll Empire |
 Twilight Eye Twilight Eye |
 Darktide Surge Darktide Surge |
| Free Rider (attack) |  Meteor Meteor |
 Eternal Vigil Eternal Vigil |
 Blooming Future Blooming Future |
 Earth Ring Earth Ring |
 Destiny Tome Destiny Tome |
| Companion Along the Way (crit) |  Gravity Gravity |
 Bladestorm Bladestorm |
 Elven Legacy Elven Legacy |
 Ruling Sword Ruling Sword |
 Twin-tailed Comet Twin-tailed Comet |
| Long Journey (penetration) |  Death Knell Death Knell |
 Broken Barricade Broken Barricade |
 Forest Ranger Forest Ranger |
 Perfect Storm Perfect Storm |
 Blazing Extremity Blazing Extremity |
The sets are the same for all classes. Set bonuses turn on at levels 3, 6, 9 and 10; the set level equals the lowest badge level in it, so level them evenly. For healing a percentage of Attack weighs the most, so Midnight Run and Free Rider (both give an Attack bonus) come first; then Companion Along the Way (Crit Bonus) and Long Journey (Penetration Bonus): their order depends on whether you have more Crit or Penetration (calculated). The game's list of valued stats for the Priest also holds Hit Rating with its bonus — it is given by the set A Toast to Life (Hit Bonus and Anticrit Bonus; 7 badges), and it weighs less than the others (calculated).
Oracle
The Oracle opens at level 90. It has five stages: War Oracle, Wisdom Oracle, Future Oracle, Wealth Oracle and Mind Oracle.
How it works. Points accumulate in each stage separately. When the threshold is reached you can pray: the prayer spends its cost, and the bonus lasts 168 hours. Re-rolling the random stats costs 100 points. A stage opens when all the previous ones are open.
| Stage | Threshold, points | Prayer cost |
|---|---|---|
| 1. War Oracle | 25,000 | 8,000 |
| 2. Wisdom Oracle | 25,000 | 8,000 |
| 3. Future Oracle | 40,000 | 8,000 |
| 4. Wealth Oracle | 40,000 | 8,000 |
| 5. Mind Oracle | 50,000 | 10,000 |
What earns points (the same for every stage):
| Material | Points each |
|---|---|
 Statue Offerings Statue Offerings |
100 (from the Inscription Prayer and the Badge Lottery) |
 Inscription Core Inscription Core |
2 (from wild map exploration, Hard Raid floors and the resource shop) |
 Inscription Essence Inscription Essence |
2 (from converting surplus inscription shards) |
| Cloths and threads | moonlight cloth 5; demon cloth 10; frostwoven cloth 20; silk thread 1; magic pattern thread 10; rune thread 100 |
What it gives. Permanent and random stats (Attack, HP, Crit, Penetration, Evasion and others); the values depend on the World Level of the server, not on your character level, and grow with it.
Towards level 100
- At 100 items of level 100–108 and gems of level 10 become available.
- There is no set for Darkdream among the level 100 items: Outland Echo boosts Groupheal and Healight (+120%), Blood Paladin — Shadow Barrage and Vampiric Touch (+110%). At level 110 Eternal Imprisonment repeats Dark Gate (+120% to Shadow Empowerment and Darkdream), and Sunshard Coalition repeats Death Wish. What is better at 100–109 depends on whether you stay on Darkdream: the effects of the scepter and gauntlets are tied to its node (logic). The weapons and gauntlets of level 100–106 were not examined.
- Inscription Rating 7000 means T6 and the T6 passive row. If you have not reached it yet, start now.
(calculated) — computed from the game data, not tested in combat. (not verified) and ❔ — not confirmed by the data. (logic) — a conclusion from reasoning.
Not checked: real healing in combat, which effects roll on which slot, which set of refinement lines applies to you, how bonuses of different items combine, whether healing beyond the missing health counts into the "total healing" of the League Trial, whether the client code of 13.10.2026 matches that of 23.09.2026 (the Trial rules for the specialization), whether boss hits reach 20% of the tank's max HP, how often the link breaks, whether the server strictly enforces the limit of identical emblems, the effect of Rapid Strike, Fierce Assault and Wound Control in combat, what to use instead of the Night Shadow Leopard, which artifact core is better.