
Guides Warrior
Warrior 90–99: builds for the Abyss, League Trial and Secret Realm
Contents
What to wear, what to learn and what to socket for the Warrior at levels 90–99. The Warrior is the tank in the game; there are three modes: Abyss, League Trial and Secret Realm. The numbers come from the game data checked on 13.10.2026, the names are as in the English version of the game. What the portal calculated is marked (calculation), what the data cannot confirm — (not verified), and what follows from reasoning rather than from tables — (logic). The fight against the Alliance boss is called "League Trial" in the game (the name "League Expedition" also occurs).
Key points
- The Warrior is a tank. The game treats Defense, Evasion, Defense Bonus, Evasion Bonus, DMG RED. as the stats worth having for the Warrior; the Warrior aura gives the group 10% less melee damage (20% if the Warrior is alone).
- The set depends on the mode: Death Wish for the Abyss, Dark Gate for the League Trial. For the Secret Realm (Bladestorm, Spiked Shieldwall) the level 90 sets do not fit.
- The effects of the weapon, gloves and set switch on only when the skill node is learned. Without the node the items give stats only.
- The Warrior specialization is about rage, not damage: the behaviour of rage is calculated, the value of the Rage Burst effects is an assumption (logic); the main layouts are the robust ones, the base ones next to them.
- The stone combination "Endless Combat Will - Enhanced" is switched on by options 1 and 2 below, option 3 does not.
- No more than two identical emblems on a pet: layouts with ×3–×4 cannot be built.
- Night Shadow Leopard is not in the data: there is no such pet in this version of the game.
- The passive rows IV–VI and the 4th–5th inscription slots are opened by class advancement; the Oracle opens at level 90.
Equipment
There are no level 99 items in the game. Items come in steps, and at the end of the range you wear the best there is:
| Slot | Weapon | Gloves | Cloak | Shoulder pads | Chestplate | Legguards | Ring | Necklace | Bracers | Mark |
|---|---|---|---|---|---|---|---|---|---|---|
| Item level | 96 | 96 | 90 | 90 | 92 | 92 | 94 | 94 | 98 | 98 |
Weapon and gloves
The effect of the weapon and gloves is tied to the skill node in the talent tree, so they are chosen for the core skill of the mode:
| Mode | Weapon (Lv. 96) | Gloves (Lv. 96) |
|---|---|---|
 Abyss Abyss |
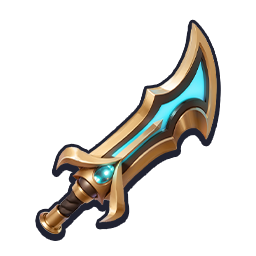 Thunder Blade Long Sword — Thunderstrike healing +55%, damage +45%; Tactical skill cooldown −15% Thunder Blade Long Sword — Thunderstrike healing +55%, damage +45%; Tactical skill cooldown −15% |
 Sword Star Gauntlets — after a Core skill, the next Thunderstrike damage and healing +55% Sword Star Gauntlets — after a Core skill, the next Thunderstrike damage and healing +55% |
 League Trial League Trial |
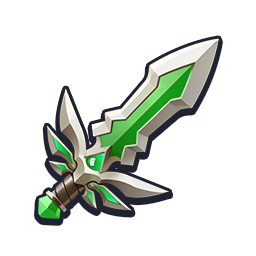 Aftershock Long Sword — Aftershock damage +60%, damage reduction +50%; Core skill cooldown −15% Aftershock Long Sword — Aftershock damage +60%, damage reduction +50%; Core skill cooldown −15% |
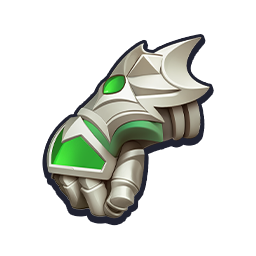 Resonance Gauntlets — after a Tactical skill, the next Aftershock damage and damage reduction +180% Resonance Gauntlets — after a Tactical skill, the next Aftershock damage and damage reduction +180% |
- The base stats of all level 96 swords are identical (Attack 1,312), and so are those of all gloves; the other swords and gloves boost Shockwave and Stormhammer (in none of the mode sets).
- Secret Realm. The effects of level 96 items belong to Thunderstrike, Aftershock, Shockwave and Stormhammer, none of which is a Secret Realm skill: the items give stats only (calculation from the node conditions), take any. Level 86 items (Sword Chime Long Sword, Thunder Blade Gauntlets) carry the right effects for Bladestorm, but their Attack is 1,002 instead of 1,312, 24% lower (calculation); which is better I did not calculate (logic).
Set: cloak, pauldrons, chestplate, legguards
| Set | Mode | 2 pieces | 4 pieces |
|---|---|---|---|
| Death Wish | Abyss |
combat evasion bonus +1.5%, Tactical skill cooldown −15% | Thunderstrike and Stormhammer: damage, healing, damage reduction and shield strength +110% |
| Dark Gate | League Trial |
combat physical defense bonus +2.5%, Core skill cooldown −15% | Shockwave and Aftershock: damage, healing, damage reduction and shield strength +120% |
- Death Wish:
 Cloak ·
  Shoulder pads ·
  Chestplate ·
  Legguards
 - Dark Gate:
 Cloak ·
  Shoulder pads ·
 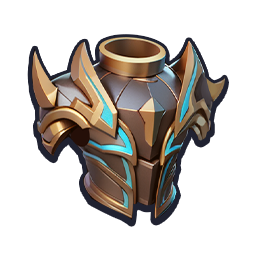 Chestplate ·
  Legguards
The 4 pieces switch on when the node of one of the two skills of the set is learned.
Accessories
| Slot | Abyss and Secret Realm | League Trial |
|---|---|---|
 Ring, 94 Ring, 94 |
 Heart of Layered Rock: 2.5% damage reduction and another 0.5% for each socketed gem of level 9 or higher, up to 7.5% Heart of Layered Rock: 2.5% damage reduction and another 0.5% for each socketed gem of level 9 or higher, up to 7.5% |
same |
 Necklace, 94 Necklace, 94 |
Winter Night Rose: after the Ultimate skill healing +9% and damage taken −9% for 10 s |  Dwarven Artificer: 2.5% damage reduction and another 1% for each Soul Forging level on this item Dwarven Artificer: 2.5% damage reduction and another 1% for each Soul Forging level on this item |
 Bracers, 98 Bracers, 98 |
Pack Leader: after a pet skill, 8% of the energy spent is returned | Blood Kiss: a basic attack that hits heals the ally with the lowest health |
 Mark, 98 Mark, 98 |
Holy Praise: restores 5% HP every 10 s; above 30% HP healing bonus +5%, below 30% damage taken −5% | same |
Gems, special effects, refinement
| Slot | Gem | Special effects (calculated order, best on the left) | Refinement (calculated) |
|---|---|---|---|
 Weapon, 96 Weapon, 96 |
 Attack Attack |
 Earth Shelter, Earth Shelter,  Unyielding, Unyielding,  Sharpness Sharpness |
Defense, HP Bonus,  DMG RED. DMG RED. |
 Gloves, 96 Gloves, 96 |
 Penetration Penetration |
Earth Shelter, Tenacity, Courage Blessing, Sharpness |
Defense, DMG RED.,  Evasion Bonus Evasion Bonus |
 Cloak, 90 Cloak, 90 |
 Defense Defense |
 Impact Reduction, Penetration, Sharpness, Courage Blessing Impact Reduction, Penetration, Sharpness, Courage Blessing |
HP, HP Bonus, Defense Bonus |
 Shoulder pads, 90 Shoulder pads, 90 |
Penetration |
Earth Shelter, Courage Blessing, Penetration, Sharpness |
HP, HP Bonus, Defense Bonus |
 Chestplate, 92 Chestplate, 92 |
 Crit RES Crit RES |
Tenacity, Sharpness, Unyielding, Courage Blessing |
Defense, HP Bonus, DMG RED. |
 Legguards, 92 Legguards, 92 |
Defense |
 Boom Boom Boom Boom!, Penetration, Unyielding, Luck Boom Boom Boom Boom!, Penetration, Unyielding, Luck |
Evasion, Evasion Bonus, Crit. RES Bonus |
| Ring, 94 |
Penetration |
Earth Shelter, Sharpness, Penetration, Courage Blessing |
HP, HP Bonus, Defense Bonus |
| Necklace, 94 |
Penetration |
Shift Focus, Tenacity, Unyielding, Courage Blessing |
HP Bonus, Crit. RES Bonus, DMG RED. |
| Bracers, 98 |
Defense |
Earth Shelter, Penetration, Courage Blessing, Sharpness |
HP, HP Bonus, Defense Bonus |
| Mark, 98 |
Defense |
Tenacity, Unyielding, Sharpness, Courage Blessing |
HP Bonus, Evasion Bonus, DMG RED. |
- Level 9 gems are the ceiling at 90–99, the type and the slot are checked against the table of allowed types. "… Bonus" is a percentage, the rest is a flat addition; "DMG RED." is a separate stat.
- The special effects are given in the calculated order (best on the left). Four effects exist only on "flashing gold" items, an ordinary mythic one has two or three; which effect drops on which slot, the data do not say ❔. The HP effects ("Strength", "Fountain of HP") are fit only for the League Trial (not verified).
- All "Refinement" lines are in the set of possible lines of the slot; which of the two sets of such lines applies to you is decided by the server ❔.
Refinement, special effects and gems recalculated for survivability (calculated)
Warrior's refinement lines, special effects and gems are recalculated for survivability: the warrior is the tank, so a line is valued by the survival formula Model.effective_hp (expected damage of a typical monster against the character), not by damage. Inside the band of thresholds it reduces to "HP/430 + Defense + Evasion + Crit RES" multiplied by (1 + DMG RED.) (calculated). Game data of 13.10.2026 (the game is rebalanced weekly). There are no real warrior builds: the base is the game's "reference character" (4 : 2 : 1.5 : 1 on defence) on the same point total as the live mage, DMG RED. 40%, each stat shifted by ±50% (not verified: the base is typical). A line is taken at its expected roll value (normal stone 35/40/20/5% at levels 9–12, advanced 30/50/20% at 11–13); the player chooses which line to replace, so target triples are compared.
- How it was calculated. The "Refinement (calculated)" column holds the survivability triples. Where flat HP and Defense are equivalent by the formula, Defense is taken — the game itself lists it as valuable.
- Why. Attack Bonus and Attack give 0 survivability: in six slots (weapon, chestplate, cloak, shoulder pads, ring, bracers) the line set has no third defensive line except the HP lines, so the calculation puts HP Bonus (and HP/Defense) in their place. The warrior's damage from Attack Bonus was not calculated.
- HP. By the formula flat HP equals Defense (one Defense = 430 HP), and HP Bonus (2.81% survivability per line) is next to Crit. RES Bonus (2.81%) and above Defense Bonus (2.47%). The warrior's best line is DMG RED. (4.09%). The game's list of valuable stats for the warrior names Defense, Evasion, Defense Bonus, Evasion Bonus and DMG RED.; HP and Crit RES are not in it and there is no explanation. The formula is for HP, combat was not tested: if HP works differently in your fights, the conclusions about the HP lines do not hold (not verified).
- Stability. Shifting any single stat by ±50% does not change the best triples, except the Mark at Evasion ×0.5 (the calculation then takes "HP, HP Bonus, DMG RED."); the largest gap over slots is 1.9…4.8 pp (calculated). Band limits: Crit RES works while it is below 25% of the rest of the defence (13% for the calculation base; 20% at ×1.5), Evasion while it is above 13% of Defense + HP/430 (25% for the calculation base; already 12.5% at ×0.5, which explains the change on the Mark).
- Special effects. The "Special effects" column is in the calculated order (best on the left). Offensive effects (Sharpness, Courage Blessing, Unyielding, "Boom Boom Boom Boom!", Luck, Penetration) give 0 survivability; defensive ones (Earth Shelter, Tenacity, Impact Reduction, Shift Focus) rank higher. The model values the HP effects ("Strength", "Fountain of HP") as HP lines (not verified) ❔.
- Gems. The table's choices are all allowed for their slots. Weapon, gloves, shoulder pads, ring and necklace accept only Attack, Penetration, Hit Rating and Crit gems, which do not change survivability; defensive gems (Defense, Evasion, Crit RES, HP) go to the other five slots and are worth the same (+0.42% survivability each). On the chestplate the table takes Crit RES: that gem hits the upper limit (Crit RES above 25% of the rest of the defence adds nothing) and loses to HP or Evasion by up to 0.9 pp in 6.5% of bases; the game recommends Evasion there (calculated).
- Not verified. The server decides which of the two line sets is active ❔; the survival formula was not tested in combat, and damage to the warrior may bypass it (percent of HP, boss mechanics) (not verified); the warrior base is typical; each slot is calculated separately from the other nine.
Skills and passives
Which skills to take
Level every one of the four branches to the end: the skill, "Warrior Skill Enhancement" and the lower node; with the root it is 10 points, 40 in total. Another 9 go into the three passive rows and 1 into "Warrior Stat". 50 out of 50 in all.
| Slot | Abyss |
 Secret Realm Secret Realm |
League Trial |
|---|---|---|---|
| Basic |  Cleave Cleave |
Cleave |
Cleave |
| Core |  Bladestorm Bladestorm |
Bladestorm |
 Aftershock Aftershock |
| Tactical |  Thunderstrike Thunderstrike |
 Spiked Shieldwall Spiked Shieldwall |
Spiked Shieldwall |
| Ultimate |  Rejuvenation Rejuvenation |
Rejuvenation |
 Shield Block Shield Block |
Shield Block and Rejuvenation are neighbouring branches of one root, you take one; Bladestorm and Aftershock, Thunderstrike and Spiked Shieldwall stand under different, mutually exclusive roots, so the tree is re-learned between the modes. In the talent tree the Warrior kept the node names of the Mage; the skill is defined by what the node unlocks:
| Skill | Talent tree node (as it is labelled in the game) |
|---|---|
| Cleave |
Warrior Arcane Missile → Warrior Fireball Spell |
| Bladestorm |
Warrior Flamehand → Warrior Shadowflame |
| Aftershock |
Warrior Frostorb → Warrior Frostfocus |
| Thunderstrike |
Warrior Blizzard → Warrior Snowstorm |
| Spiked Shieldwall |
Warrior Ball Lightning → Warrior Paralyzing Lightning |
| Shield Block |
Warrior Transcendence → Warrior Dualcast |
| Rejuvenation |
Warrior Transcendence → Warrior Arcaneblast |
Passives: Class Core Passive and Core Passive
The three lower rows of "Talents": each has one node, left or right, 3 points per row. The rows are opened by class advancement: Warrior rank IV, V and VI, the condition is an Inscription Rating of 1000, 2500 and 7000. The pick is by logic (logic).
| Row | Left node (3 points) | Right node (3 points) | Pick |
|---|---|---|---|
| IV | +10.5% Combat Physical Defense Boost | +11.7% Combat Evasion Boost | left |
| V | after the Core skill, +11.25% physical defense and +6.75% evasion for 10 s, cooldown 15 s | the same after a Tactical skill | left |
| VI | +7% Combat Physical Defense Boost | +7.8% Combat Evasion Boost | left |
- In IV and VI the left node is physical defense, the right one is evasion; the main things for the Warrior are damage reduction and defense, so take the left one (logic). In V the Core skill is used three times as often as the Tactical (cooldown 4.3 s against 13 s), so take the left one (calculation).
- The last point of the 50 goes into "Warrior Stat 1" (Defense Bonus +1% per point). Nodes 2–4 give per point an Evasion Bonus +1.5%, Attack Bonus +0.5%, Penetration Bonus +1% (which is better, not verified).
Inscriptions
Inscriptions are put on in the  "Runes" menu. The main and two auxiliary ones are available at once, the 4th and 5th slots are opened by class advancement (not verified for the Warrior). The main one is first in the list.
Abyss and League Trial
| Option | Main | Aux 1 | Aux 2 | Aux 3 | Aux 4 |
|---|---|---|---|---|---|
| Main set |  Steelbone Valor Steelbone Valor |
 Combat Cry Combat Cry |
 Ambush Tactic Ambush Tactic |
 Final Tactic Final Tactic |
 Standby Tactic Standby Tactic |
The main one is "Steelbone Valor": a permanent damage reduction of 7–13% (by step) without a cooldown. The auxiliary ones also reduce damage; "Final Tactic" (+100% to the initial cooldown of the main one), "Ambush Tactic" (+50%) and "Combat Cry" (+10% to all) increase the cooldown, but the main inscription has none, so this costs nothing (logic). The fifth auxiliary one is "Standby Tactic", "Resolute Glory" or "Ready Tactic". The game's own "Balance" scheme is almost the same ("Advance Tactic" instead of "Combat Cry") and is recommended for encounters, for example the Abyss.
Secret Realm
| Option | Main | Aux 1 | Aux 2 | Aux 3 | Aux 4 |
|---|---|---|---|---|---|
| Boss: first trigger at 1 s |  Imperial Valor Imperial Valor |
 Rush Tactic Rush Tactic |
 Swift Tactic Swift Tactic |
 Adversity Glory Adversity Glory |
 Advance Tactic Advance Tactic |
| Monster packs: at 3 s | Imperial Valor |
Swift Tactic |
 Immortal Immortal |
Adversity Glory |
Rush Tactic |
The main one is "Imperial Valor": the first trigger comes 30 s into the fight, then 20 s of damage reduction of 30.8–47% (by step), then a 60 s pause with a value from −5% to −10.6%. The auxiliary inscriptions move the first trigger so that the protection switches on at the start of the fight; the game's own "Extreme Speed" scheme is built the same way. In a long fight "Steelbone Valor" is more reliable: if the cycle is 20 s of action and 60 s of pause (not tested in combat), the average over the cycle is about 3.8–3.9% against a permanent 7–13% (calculation).
Inscription percentages add up, seconds are subtracted from the result (without auxiliary ones — the 30th second):
| Auxiliary | Triggers at | If the percentages multiplied |
|---|---|---|
| no auxiliary | 30 s | 30 s |
| Swift Tactic (−30%) | 21 s | 21 s |
| Swift + Rush Tactic (−50%) | 6 s | 10.5 s |
| Swift + Rush + Advance Tactic (−5 s) | 1 s | 5.5 s |
| Swift + Rush Tactic + Immortal (−10%) | 3 s | 9.45 s |
The values "1 s" and "3 s" come out only when percentages add up (with multiplication it would be 5.5 s and 9.45 s); the rule has not been checked in the client (not verified; whether there is a lower limit of the initial cooldown, the data do not say).
Specialization: Endless Combat Will
The Warrior accumulates rage: +1 for every hit taken, maximum 300. A full bar switches on the Rage Burst: skill area +50%, rage is spent at 20 per second until zero (at 300 that is 15 s (calculation)), hits do not add it. The nodes speed up the gain, strengthen the burst, spend rage on strengthening the Tactical skill or on absorbing a big hit. There are 20 points, one is taken by the core; a node opens when the needed number of points is invested (the core counts).
| Node | Max | After N points | What it does (values by level from the data) |
|---|---|---|---|
 Rage Enhancement Rage Enhancement |
5 | 5 | using a Tactical skill spends 50 rage and strengthens the skill effect by 5/8/12/16/20% for 3 s |
 Rage Burst Rage Burst |
5 | 13 | using a Core skill gives another 10/15/20/25/30 rage with a 15/20/25/30/40% chance |
 Blazing Flame Barrier Blazing Flame Barrier |
3 | 10 | during Rage Burst an additional damage reduction of 5/10/15% (lasts up to 10 s) |
 Furious Heart Furious Heart |
3 | 1 | every hit taken gives another 0.5/1/2 rage |
 Rage Overflow Rage Overflow |
3 | 1 | maximum rage +50/100/200 |
 Unyielding Fury Unyielding Fury |
2 | 6 | during Rage Burst Rage Enhancement spends 7/15 less (up to 10 s) |
 Combat Intensity Combat Intensity |
2 | 16 | during Rage Burst the chance of Rage Burst node +30/60 percentage points (up to 10 s) |
 Rage Sanctuary Rage Sanctuary |
3 | 6 | a hit above 40% of maximum HP can be absorbed completely for 200/150/50 rage, cooldown 60 s |
 Oppressive Energy Charging Oppressive Energy Charging |
3 | 1 | outside Rage Burst every 5 s +10/20/30 rage; more than 15 enemies around - the same again |
 Intimidating Taunt Intimidating Taunt |
2 | 5 | during Rage Burst the taunt range +60/100% |
What is calculation here and what is assumption
This is not a damage specialization: for the Hunter it multiplies damage, for the Warrior it is a resource economy, and what the burst turns into (area, barrier, taunt, enhancement, absorption) is not expressed in units of benefit in the data. Only the behaviour of rage is determined by calculation: the share of time in the burst, the number of bursts, the share of strengthened casts and absorbed hits (calculation). The "benefit" objective is an assumption (logic): damage reduction from the nodes "Blazing Flame Barrier" and "Rage Sanctuary" + area (for groups) + strengthening of the Tactical skill + 0.1 × taunt, equal weights; the "best" layouts below are best under it, not proven best. Unknown: the rate of hits on the Warrior; whether bosses have hits above 40% of maximum HP (the node "Rage Sanctuary" rests on them); how many new targets the area gives.
The main layout of a mode is the robust one: in the worst of the variants of assumptions (rate of hits, big hits, fight length, number of enemies, reading of the data; 125 of them for the League Trial, seventeen for the other modes) it loses less than any other from the best for that variant ("maximin"). The base optimum is the best under the base assumptions, it can be noticeably worse if the assumptions do not hold (calculation). The model calculates rage in steps of 0.25 s for all allowed layouts (60,207 of 122,167 with a sum of 20): League Trial — four Warrior tanks in turn (one lives 200 or 600 s), a boss hitting 0.75 hits/s plus its Wrath skill, and waves of mobs (more below); Secret Realm — 5 enemies, 300 s, 2.9 hits/s standing and 1.7 moving; Abyss — 200 s of packs on the way to the boss (6 enemies, 2.1 hits/s) and 200 s at the standing boss. All of this is assumption.
Layouts by mode
In the cell: the number of points in the robust layout and in brackets in the base optimum (if they differ). The Warrior has no "standing / moving" mechanic in the data: "standing" and "moving" differ in the calculation only by the rate of hits.
| Node | Max | League Trial |
Secret Realm, standing |
Secret Realm, moving |
Abyss, packs and boss |
|---|---|---|---|---|---|
| Rage Enhancement |
5 | 4 (5) | 0 | 0 | 5 (0) |
| Rage Burst |
5 | 3 (1) | 5 | 5 | 0 (5) |
| Blazing Flame Barrier |
3 | 3 | 3 | 3 | 3 |
| Furious Heart |
3 | 3 | 3 | 3 | 3 (2) |
| Rage Overflow |
3 | 0 | 0 | 1 (0) | 0 |
| Unyielding Fury |
2 | 0 | 0 | 0 | 0 (1) |
| Combat Intensity |
2 | 0 | 2 | 2 | 0 |
| Rage Sanctuary |
3 | 3 | 1 | 0 (1) | 3 |
| Oppressive Energy Charging |
3 | 3 | 3 | 3 | 3 |
| Intimidating Taunt |
2 | 0 (1) | 2 | 2 | 2 |
| Total points (with the core) | 20 | 20 | 20 | 20 |
In the worst of the variants the robust layouts give from 85 to 88% of the optimum of their scenario (on average 93–98%), the base optima — from 80 to 88% (calculation). For the League Trial the worst case is 76% (91% on average) for the robust layout and 64% for the base one (calculation).
- Groups (Secret Realm, Abyss packs): Burst 5, Barrier 3, Heart 3, Intensity 2, Pressure 3, Taunt 2 and one free point (Unyielding or Sanctuary). One level of "Rage Enhancement" cuts the share of time in the burst by 17–20%, so it stays at zero. But with three times the weight of the Tactical skill strengthening (Secret Realm, Abyss packs) or zero benefit from the area (Secret Realm) the layout with "Rage Enhancement" 3–4 is better (calculation under assumptions).
- Abyss boss (a standing boss): the common core is Enhancement 5, Sanctuary 3, Barrier 3, Pressure 3. The node "Rage Sanctuary" rests on the assumption that the boss has hits above 40% of maximum HP: without them the base layout gives only 81% of the optimum, the robust one not less than 85% (calculation).
- League Trial (the layout in the table: Enhancement 4, Burst 3, Barrier 3, Heart 3, Sanctuary 3, Pressure 3): Warriors take the tank slot in turn (3 s to switch), a tank has ×5 health, and the tanks' points are split by time alive; a tank's damage does not count toward the squad's points (game data). So this layout is about survival: "Blazing Flame Barrier" and "Rage Sanctuary" stay at the maximum, while "Intimidating Taunt" and the area of "Rage Burst" add no points (assumption). Waves of mobs appear in the fight (about seven alive on average, at most thirteen); together with the boss that is at most 14 enemies, so the "more than 15 enemies around" condition of "Oppressive Energy Charging" is not met (calculated from the spawn table). What rage their hits give is not visible in the data, and it decides how many points go into "Rage Enhancement" and "Rage Burst" (not verified). The robust layout is a compromise over three unknowns: whether mobs hit enough to give rage, how long one tank lives, and whether "Rage Enhancement" protects "Spiked Shieldwall". If mobs do give rage, take "Rage Enhancement" 5 and "Rage Burst" 1 (the base layout in brackets); if not, "Rage Burst" 3 or more and "Enhancement" 4 or fewer (calculated, under assumptions). "Rage Sanctuary" only pays off when the boss has big hits: without them the extra three points cost up to 9 percentage points, with them losing the node costs up to half.
- Abyss: packs only (robust = base): Burst 5, Barrier 3, Heart 3, Intensity 2, Sanctuary 1, Pressure 3, Taunt 2 (worst case 93%); boss only (robust): Enhancement 5, Burst 3, Barrier 3, Heart 1, Unyielding 1, Sanctuary 3, Pressure 3 (88%); "packs and boss" is a compromise. Secret Realm: the Warrior holds the monsters himself, standing is possible; "moving" differs from "standing" only in that instead of Sanctuary 1 it takes "Rage Overflow" 1.
Magic stones
Stones come in six shapes: round shield, triangle, prism, tower shield, star, moon. A combination switches on when the five cells hold stones of the needed five shapes (only the shape matters). The Warrior has four combinations, each with a star and a moon:
- 1) round shield, triangle, prism, star, moon → Endless Combat Will - Enhanced: rage drain during Rage Burst −10 per second (20 → 10)
- 2) round shield, triangle, tower shield, star, moon → Rage Enhancement - Enhanced: rage spent on Rage Enhancement −20 (50 → 30)
- 3) two triangles, tower shield, star, moon → Rage Burst - Enhanced: Rage Burst gives another +20 rage when it triggers
- 4) two round shields, prism, star, moon → Rage Sanctuary - Enhanced: rage spent on Rage Sanctuary −50
Options 1 and 2 switch on combination 1 "Endless Combat Will - Enhanced":  Assault Round Shield,
  Punisher Triangle (way 2:
  Arbiter Triangle),
  Assault Prism,
  Star of Sorrow (any star),
  Moon of Tenacity (any moon). The rage drain in the burst falls from 20 to 10 per second, and at 300 rage it lasts 30 s instead of 15 (calculation). Take the star and moon with the potential "Assault Mastery" or "Assault Amplify" (they strengthen "Fierce Assault"), otherwise with "Damage Control Mastery".
- Option 1: "Rapid Strike" 65, "Fierce Assault" 165, "Assault Bonus" 60%. Option 2: "Fierce Assault" 165, "Wound Control" 65, "Assault Bonus" 60%.
- Option 3 (round shield and prism of damage control, tower shields of the commander and the strategist, howler triangle) does not switch on a combination: it has no star and moon. "Wound Control" 165, "Wound Control Bonus" 140%. By the attribute "Wound Control" the set of the damage control round shield, the arbiter and howler triangles, the damage control prism and the strategist tower shield gives 230 against 165 for option 3 (calculation).
"Rapid Strike" strengthens the damage, healing, shield and damage reduction of basic attacks and the Core skill (+1% for every 30 points), "Fierce Assault" — of the Tactical and Ultimate, "Wound Control" — of pet skills (not tested in combat). By the potential table, the potential "Specialization Empowerment" has no rows for the Warrior specialization skills, "Specialization Resonance" strengthens the node "Blazing Flame Barrier", "Fervent Combat Spirit" (combination 1) — the widening of the area in the burst.
Artifacts
Each artifact has small cells (offensive and defensive) and a central one for the core.
| Artifact | Cells (attack / defense) | Core |
|---|---|---|
 Norgannon's Disk (Lv. 64, basic skills) Norgannon's Disk (Lv. 64, basic skills) |
2 / 0 |  Titan Data - Analysis Titan Data - Analysis |
 Judgment of Death (Lv. 70, core skills) Judgment of Death (Lv. 70, core skills) |
2 / 2 |  Scourge Legion - Spear Wall Scourge Legion - Spear Wall |
 Comet's Trail (Lv. 74, tactical skills) Comet's Trail (Lv. 74, tactical skills) |
2 / 2 |  Comet Tailfire - Annihilation Comet Tailfire - Annihilation |
 First Empire Combat Flag (Lv. 80, ultimate) First Empire Combat Flag (Lv. 80, ultimate) |
3 / 3 |  Double-Headed Eagle Emblem - Glory (Abyss) / Double-Headed Eagle Emblem - Glory (Abyss) /  Double-Headed Eagle Emblem - Unyielding (League Trial) Double-Headed Eagle Emblem - Unyielding (League Trial) |
-
Cores (by artifact, as in the table):
- Titan Data - Analysis — a skill has a 15% chance to apply burn, bleed or slow (by the game text also paralysis) to the target for 5 s and heals you;
- Scourge Legion - Spear Wall — Basic and Core skills hit 5 or more targets: you are healed additionally;
- Comet Tailfire - Annihilation — the target has 2 or more debuff types: with a chance (30% in the data) the Ultimate skill fires and the debuffs are removed;
- Double-Headed Eagle Emblem - Glory (Abyss) — every 12 skills +0.8% damage and healing until the end of the fight (the text says up to 16 times, the buff records 12);
- Double-Headed Eagle Emblem - Unyielding (League Trial) — standing still for more than 3 s: +8% damage and healing until you move.
- The numbers are for top-quality cores; chances and coefficients are raw in the data (not verified). "Unyielding" is used instead of "Glory" in the League Trial; the effect also makes sense where you can stand (Secret Realm) (logic).
-
Small cells. Into the offensive ones go "Strong Nexus" (Tactical and Ultimate skills; its pair "Power Nexus" strengthens Basic and Core ones). Into the defensive ones go "Stable Nexus" (less damage from Basic and Core skills) and "Resolute Nexus" (from Tactical and Ultimate). One set for the Abyss and the Secret Realm.
-
Properties when rerolling: base — "Fierce Assault" (the main one), "Rapid Strike", "Wound Control" (for a pure tank); legendary — "Eternal Core" (the core does not spend durability), "Core Enhancement" (+50% to the base effects of the core), "Core Overload" (+100%, but for every 10% of durability lost the effect falls by 10%) (what to take, not verified).
Pet emblems
The three pets have their own cells: the first has triangular (△), the second hexagonal (⬡), the third quadrangular (◇). No more than two identical emblems per pet ("×2"), "Unique" is one copy. The numbers are for emblems of the top rank (Skullsplit Fighter reaches only the 4th).
Layouts with ×3–×4 identical emblems cannot be built: the limit in the data is two. "Frenzied Wildsoul" is hexagonal (⬡) in the data; it cannot be put into △. Whether the client enforces the limit strictly or only the server does, the data do not say (not verified).
Level 90 emblems appear in waves: the first from server day 83, the second from day 139. The main rows are for a server older than 139 days, on a younger one take "before day 139". The score is the portal model by survivability weights, taken from a base character, not from a real Warrior; the choice between close layouts is conditional (calculation, assumption).
"Valued by the game"
The main style of the Warrior: Defense, Evasion, their bonuses and "DMG RED.".
| Pet | Emblem 1 | Emblem 2 | Emblem 3 | Emblem 4 | Emblem 5 | Total |
|---|---|---|---|---|---|---|
 after day 139 after day 139 |
 Cryptlord ×2 Cryptlord ×2 |
 Shadow Thunderlizard ×2 Shadow Thunderlizard ×2 |
 Phantom Cryptlord Phantom Cryptlord |
Defense 1,100, Crit 2,200, Penetration 800, Evasion Bonus 123.2%, Penetration Bonus 31.9% |
||
| before day 139 |
Cryptlord ×2 |
Shadow Thunderlizard ×2 |
 Stormkin Stormkin |
Defense 650, Crit 2,200, Penetration 800, Evasion Bonus 123.2%, Penetration Bonus 21.5% |
||
 after day 139 after day 139 |
 Frenzied Wildsoul (Unique) Frenzied Wildsoul (Unique) |
 Fel Statue (Unique) Fel Statue (Unique) |
 Rampaging Cryptlord (Unique) Rampaging Cryptlord (Unique) |
 Phantom Thunderlizard ×2 Phantom Thunderlizard ×2 |
Defense 1,100, Evasion 650,  HP 279,500, Penetration 2,200, Defense Bonus 43%, Evasion Bonus 127.5% HP 279,500, Penetration 2,200, Defense Bonus 43%, Evasion Bonus 127.5% |
|
| before day 139 |
Frenzied Wildsoul (Unique) |
Fel Statue (Unique) |
Rampaging Cryptlord (Unique) |
 Waterkin ×2 Waterkin ×2 |
Defense 1,100, Evasion 650, HP 279,500, Crit 1,300, Defense Bonus 43%, Evasion Bonus 99.7% |
|
 after day 139 after day 139 |
 Skullsplit Fighter Skullsplit Fighter |
 Frenzied Icebear Frenzied Icebear |
 Fel Tyrannosaur Fel Tyrannosaur |
 Rampaging Golem Rampaging Golem |
 Nightshade Wildsoul Nightshade Wildsoul |
Defense 1,750, Evasion 660, HP 752,500, DMG RED. 67.8% |
| before day 139 |
 Hydra Hydra |
 Webweaver Cryptlord Webweaver Cryptlord |
Frenzied Icebear |
Fel Tyrannosaur |
Rampaging Golem |
Defense 1,050, HP 924,500, DMG RED. 64.1% |
Survivability + penetration and hit
HP, Crit RES, Penetration and Hit Rating added (assumption); only for a server older than 139 days.
| Pet | Emblem 1 | Emblem 2 | Emblem 3 | Emblem 4 | Emblem 5 | Total |
|---|---|---|---|---|---|---|
| after day 139 |
Shadow Thunderlizard ×2 |
Phantom Cryptlord ×2 |
Stormkin |
Defense 2,850, Crit 2,200, Evasion Bonus 85%, Penetration Bonus 85.3% |
||
| after day 139 |
Rampaging Cryptlord (Unique) |
 Shadow Broodmother ×2 Shadow Broodmother ×2 |
Phantom Thunderlizard ×2 |
Defense 1,100, Evasion 2,200, Penetration 2,200, Evasion Bonus 127.5%, Penetration Bonus 63.8% |
||
| after day 139 |
Skullsplit Fighter |
Frenzied Icebear |
Fel Tyrannosaur |
Rampaging Golem |
Nightshade Wildsoul |
Defense 1,750, Evasion 660, HP 752,500, DMG RED. 67.8% |
"DMG RED." exists only on ◇ emblems; five "Unique" emblems with it and with HP give 64–68% — this is about the composition of the pools, not about the "best" pet. All the emblems of the tables come from the Monster Invasion gameplay and the Auction House. Each rank step burns three copies of the previous one: one emblem of the top rank needs nine root ones.
Pets
The team has three pets (the third from class rank III). Night Shadow Leopard is not in the data, so in the lineups with it two pets out of three can be built:
- Secret Realm, base set:
 Soulclaw,
  Light Howl or
  Overlord,
  Landslide or
  Dancer.
 - Secret Realm, single boss: Landslide, Light Howl (if it cannot hold - Overlord) and "Night Shadow Leopard".
- Abyss: Soulclaw,
 Iron Rider and "Night Shadow Leopard".
 - League Trial, manual: Landslide, Iron Rider and the leopard; auto: Overlord, Iron Rider and the leopard. By the game text the leopard copies the skill of another pet every 15 s, so the cycle of Landslide plus a copied skill cannot be reproduced without it.
What replaces the leopard, the data do not say: Landslide, Light Howl or Overlord would fit (logic). By the data:
- Soulclaw pulls monsters in a 20 m radius and taunts them, its skill exists already at 0 stars; Iron Rider gives damage reduction for 4 s, at 6★ it has an evolution (raising it to 6★ first agrees with the data); Overlord taunts in a 12.5 m radius and slowly heals.
- Landslide and Dancer are damage (a shield and a burst; Weakness on non-crit hits); Light Howl — damage and healing higher for 7 s, free on a new server for the seven-day event (the reward for 420 points);
 Bigfoot — damage, healing and defense bonuses for 7 s. Unlike Soulclaw, it has no pulling and no taunt (not confirmed).
Badges
The sets are the same for all classes. Level the badges evenly (the set bonuses switch on at set levels 3, 6, 9 and 10). By the list of stats worth having for the Warrior, Midnight Run and Free Rider fit (logic).
- A Toast to Life (Hit Bonus 1.1%, Crit. RES Bonus 1.1%)
- Companion Along the Way (Crit Bonus 1.1%, HP Bonus 0.6%)
- Midnight Run (Attack Bonus 0.6%, Evasion Bonus 1.1%)
- Long Journey (Penetration Bonus 1.1%, HP Bonus 0.6%)
- Free Rider (Attack Bonus 0.6%, Defense Bonus 1.1%)
Oracle
The Oracle opens at level 90. It has five stages: War Oracle, Wisdom Oracle, Future Oracle, Wealth Oracle and Mind Oracle. A prayer in a stage gives permanent and random stats for 168 hours.
How it works. Points accumulate in each stage separately. When the threshold is reached you can pray: the prayer spends its cost, and the bonus lasts 168 hours. Re-rolling the random stats costs 100 points. A stage opens when all the previous ones are open.
| Stage | Threshold, points | Prayer cost |
|---|---|---|
| 1. War Oracle | 25,000 | 8,000 |
| 2. Wisdom Oracle | 25,000 | 8,000 |
| 3. Future Oracle | 40,000 | 8,000 |
| 4. Wealth Oracle | 40,000 | 8,000 |
| 5. Mind Oracle | 50,000 | 10,000 |
What earns points (the same for every stage):
| Material | Points each |
|---|---|
 Statue Offerings Statue Offerings |
100 (from the Inscription Prayer and the Badge Lottery) |
 Inscription Core Inscription Core |
2 (from wild map exploration, Hard Raid floors and the resource shop) |
 Inscription Essence Inscription Essence |
2 (from converting surplus inscription shards) |
 Moonlight Cloth Moonlight Cloth |
5 |
 Demon Cloth Demon Cloth |
10 |
 Frostwoven Cloth Frostwoven Cloth |
20 |
 Silk Thread Silk Thread |
1 |
 Magic Pattern Thread Magic Pattern Thread |
10 |
 Rune Thread Rune Thread |
100 |
What it gives. Permanent and random stats (Attack, HP, Crit, Penetration, Evasion and others); the values depend on the World Level of the server, not on your character level, and grow with it.
Towards level 100
- The level 100 sets fit the Secret Realm, not the Abyss or the League Trial: Outland Echo boosts Bladestorm (+120%), Blood Paladin — Spiked Shieldwall (+110%). For the Abyss and the League Trial the sets return at level 110. What is better at 100–109 — level 90 items with the right set or level 100 items without one — depends on the mode (logic). I did not look at the weapons and gloves of level 100–106.
- Inscription Rating 7000 means T6 and the T6 passive row; if you have not reached it yet, start now.
(calculation) — calculated from the game data, not tested in combat. (not verified) and ❔ — the rule lives on the server or is not confirmed by the data. (logic) — a conclusion from reasoning, not from a table.
Not checked: real damage in combat, the value of the Rage Burst effects, the rate of hits on the Warrior, which effects drop on which slot, the action of Rapid Strike, Fierce Assault and Wound Control, what replaces the Night Shadow Leopard.