
Guides Archer
Hunter 90–99: Crit and Penetration Builds
Contents
What a Hunter at level 90–99 should wear, learn and slot. Two play styles — Attack + Crit and Attack + Penetration — and three modes: Abyss, League Expedition and Secret Realm. Numbers come from the game data as checked on 13.10.2026; names are the ones used in the English version of the game. What the portal calculated is marked (calculated), what the data cannot confirm — (not verified), and what follows from reasoning rather than from the tables — (logic).
Key points
- At 90–99 the Hunter plays Moondance. It is the Core skill; the Dark Gate set, the Crescent Moon Short Bow and the Bowstring Moon Gauntlets all boost it.
- The effects of the bow, gauntlets and set only work when the node of the skill is learned. Without the Moondance node the items give stats only.
- Stable Victory is a percentage of Hit Rating, not a victory (in the Russian version it is "Стабильный напор").
- A Penetration gem does not fit into the weapon. Weapons take Attack, Hit Rating and Crit gems. At 90–99 gems go up to level 9.
- In Thermal Shooting, Thermal Intensity 3/3 and Energy Storage Loading 5/5 are needed in every mode (calculated). The data does not tell the unit of Thermal Enhancement or whether the heat reset after overheating counts as a "decrease", so the main layouts are the robust ones.
- The magic stone combination Energy Storage Loading - Enhanced turns on only with the set "round shield, triangle, tower shield, star, moon". The "pure stat" sets from the source guide do not turn it on.
- No more than two identical emblems per pet. The layouts from the source guide with four or five identical emblems cannot be assembled.
- Passive rows IV–VI and the 4th and 5th inscription slots are unlocked by class promotion.
- The Oracle opens at level 90 — start saving materials in advance.
Equipment
There are no level 99 items in the game. Items come in steps, and by the end of the range you wear the best that exists:
| Slot | Weapon | Gloves | Cloak | Shoulder pads | Chestplate | Legguards | Ring | Necklace | Bracers | Mark |
|---|---|---|---|---|---|---|---|---|---|---|
| Item level | 96 | 96 | 90 | 90 | 92 | 92 | 94 | 94 | 98 | 98 |
Bow and gauntlets
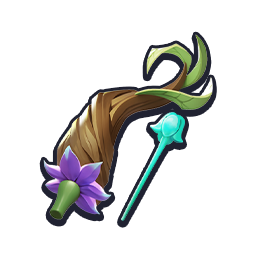 Crescent Moon Short Bow (Lv. 96): Moondance cuts cause bleeding (damage rate 88, stacks); Core skill cooldown −15%.
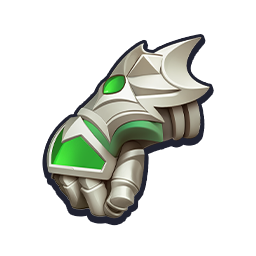 Bowstring Moon Gauntlets (Lv. 96): after a Tactical skill, the next Moondance deals 180% more damage.
The other Lv. 96 bows and gauntlets (Eclipse, Roar Gathering and Aiming Short Bows; Cold Moon, Calibrated and Crossfire Gauntlets) boost Vengeful Moonblade, Dual Warhawks and Gryphon, not Moondance.
Set: cloak, pauldrons, chestplate, legguards
Wear Dark Gate. It boosts the same Moondance as the bow and gauntlets.
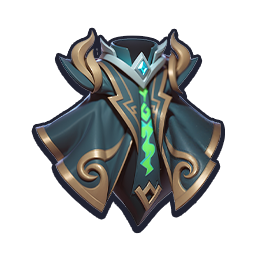 Cloak ·
  Pauldrons ·
 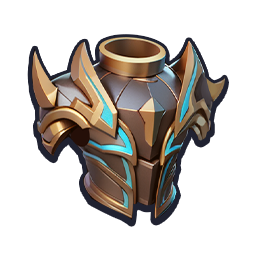 Chestplate ·
 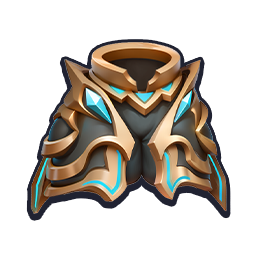 Legguards
- 2 pieces — +2.5% Combat Attack Boost, Core skill cooldown −15%;
- 4 pieces — Moondance and Vengeful Moonblade: damage +120%.
The Russian version calls the set "Тёмный Портал" and the items "Тёмные Врата" ("Dark Gate Cloak" and so on); in English both are Dark Gate. It is the same set.
Why not Death Wish. It boosts Dual Warhawks and Gryphon by 110% — Tactical skills — and cuts Tactical cooldown by 15%. By the data a Tactical skill has a 13 s cooldown and the Core skill 4.3 s: the Core skill is used about three times as often (calculated), so Dark Gate with the bow and gauntlets suits it better (logic); the portal did not calculate the Hunter as a whole.
Accessories
Each slot has two effects to choose from. Which is better depends on your build.
| Slot | Main choice | Replacement |
|---|---|---|
 Ring, 94 Ring, 94 |
Shimmering Vision: +3% damage bonus and another +0.5% for each socketed gem of level 9 or higher, up to +8% | Demon Hunter: damage to mobs and bosses +5% |
 Necklace, 94 Necklace, 94 |
Elven Artificer: +3% damage bonus and another +1% for each Soul Forging level on this item | Step into Eternal Night: after the Ultimate skill, damage +10% for 10 s |
 Bracers, 98 Bracers, 98 |
Pack Leader: after a pet skill, 8% of the energy spent is returned | Thunder Curse Domain: when a basic attack hits, 30% chance of a lightning strike (damage rate 400%) |
 Mark, 98 Mark, 98 |
Swordplay Master: while health is above 30%, +6% damage bonus | — |
The ring's threshold is level 9 gems: change the ring together with the gems. If you have fewer than five, Demon Hunter may be better (3% + 5 × 0.5% = 5.5% is already above 5%) ❔: the two kinds of bonus cannot be compared by the game's formula.
Gems, special effects, refinement
In the Gem column: crit / penetration. A Penetration gem does not fit into the weapon, so it takes Crit in both styles.
| Slot | Gem | Special effects (left = more important; * = crit build only) | Refinement: crit | Refinement: penetration |
|---|---|---|---|---|
 Weapon, 96 Weapon, 96 |
 Crit Crit |
 Courage Blessing, Sharpness, Courage Blessing, Sharpness,  Accuracy, Accuracy,  Unyielding Unyielding |
Attack, Attack Bonus, Penetration Bonus |
Penetration Bonus, Attack Bonus, Attack |
 Gloves, 96 Gloves, 96 |
Crit /  Penetration Penetration |
Courage Blessing, Sharpness,  Boom Boom Boom Boom!, Luck Boom Boom Boom Boom!, Luck |
Crit Bonus, Crit, Hit Bonus |
Crit Bonus, Hit Rating, Crit |
 Cloak, 90 Cloak, 90 |
 Evasion Evasion |
Courage Blessing, Sharpness, Penetration, Stable Victory |
Attack Bonus,  Damage Bonus, Penetration Damage Bonus, Penetration |
Penetration, Attack Bonus, Damage Bonus |
 Shoulder pads, 90 Shoulder pads, 90 |
 Attack Attack |
Courage Blessing, Sharpness, Boom Boom Boom Boom!*, Penetration |
Damage Bonus, Attack Bonus, Penetration |
Penetration, Damage Bonus, Attack Bonus |
 Chestplate, 92 Chestplate, 92 |
Evasion |
Courage Blessing, Sharpness, Luck*, Unyielding |
Crit, Attack Bonus, Penetration Bonus |
Penetration Bonus, Attack Bonus, Attack |
 Legguards, 92 Legguards, 92 |
 HP HP |
Boom Boom Boom Boom!, Luck, Penetration, Unyielding |
Crit Bonus, Damage Bonus, Crit |
Penetration, Damage Bonus, Crit |
| Ring, 94 |
Crit / Penetration |
Courage Blessing, Sharpness, Penetration, Stable Victory |
Attack Bonus, Damage Bonus, Penetration |
Penetration, Attack Bonus, Damage Bonus |
| Necklace, 94 |
Crit / Penetration |
Courage Blessing, Sharpness, Accuracy, Unyielding |
Attack, Attack Bonus, Penetration Bonus |
Penetration Bonus, Attack Bonus, Attack |
| Bracers, 98 |
Evasion |
Courage Blessing, Sharpness, Boom Boom Boom Boom!*, Penetration |
Crit Bonus, Damage Bonus, Attack Bonus |
Attack Bonus, Penetration, Damage Bonus |
| Mark, 98 |
Evasion |
Courage Blessing, Sharpness, Luck*, Unyielding |
Crit, Attack Bonus, Penetration Bonus |
Penetration Bonus, Attack Bonus, Attack |
- "Attack" is a flat amount, "Attack Bonus" is a percentage (the same for Crit, Penetration and Hit Rating); " Damage Bonus" increases all damage.
- By the data every line of the Refinement column belongs to the set of possible lines of its slot; the game has two such sets and the server decides which one applies to you ❔.
- Four special effects only appear on Golden Flashing items, a regular Mythic item has two or three — pick them from left to right. Which effect can roll on which slot the data does not say ❔.
- On bracers, aim for Boom Boom Boom Boom! (+17% Crit on items 90–98), not Boom Boom! (+6.8%). In the source guide the bracers line reads "爆爆" — by the data that is Boom Boom!; it looks like a typo (not verified).
Skills and passives
Which skills to take
Max out each of the four branches: the skill, Hunter Skill Enhancement and the bottom node (Major Upgrade for the Basic skill, Medium Upgrade for the others). That is 40 points. Another 9 go into the three passive rows and 1 into Hunter Stat. 50 out of 50 in total.
| Slot |  Abyss Abyss |
 Secret Realm Secret Realm |
 League Expedition League Expedition |
|---|---|---|---|
| Basic |  Double Shot Double Shot |
Double Shot |
Double Shot |
| Core |  Moondance Moondance |
Moondance |
Moondance |
| Tactical |  Gryphon Gryphon |
 Shock Trap Shock Trap |
Gryphon |
| Ultimate |  Stunning Hunt Stunning Hunt |
Stunning Hunt |
Stunning Hunt |
- Core skill — Moondance. The bow, gauntlets and four pieces of Dark Gate boost exactly it. Next to it in the branch is
 Vengeful Moonblade: the set boosts it too, but the bow and gauntlets for it are different. The two nodes are mutually exclusive.
 - The Tactical skill is taken from the source guide: Gryphon in the Abyss and League Expedition, Shock Trap (paralyzes the target) in the Secret Realm. The portal did not calculate the "share" of the Hunter's Tactical skills (not verified). The Gryphon and Trap branches are mutually exclusive, so in the Secret Realm the tree has to be re-learned.
- Stunning Hunt (ultimate): +80% attack speed for 10 s, basic skills explode over an area and slow the target (up to 3 stacks).
In the Hunter's talent tree the node names are left over from the Mage; the skill is defined by what the node unlocks:
| Skill | Talent tree node (as it is labelled in the game) |
|---|---|
| Double Shot |
Hunter Arcane Missile → Hunter Frostbolt |
| Moondance |
Hunter Frostorb → Hunter Frost Diffusion |
| Gryphon |
Hunter Blizzard → Hunter Slowing Blizzard |
| Shock Trap |
Hunter Ball Lightning → Hunter Paralyzing Lightning |
| Stunning Hunt |
Hunter Arcane Barrage → Hunter Doomarrow |
Passives: Class Core Passive and Core Passive
The three bottom rows of Talent: in each you pick one node, left or right, and a row takes 3 points. Rows are unlocked by class promotion, not by level: for the Mage it is Inscription Rating 1000, 2500 and 7000, for the Hunter the thresholds are not traced in the data (not verified).
| Row | Left node | Right node | Attack + Crit | Attack + Penetration |
|---|---|---|---|---|
| IV | +7.5% Combat Attack Boost | +11.7% Combat Penetration Boost | left | right |
| V | after the Core skill, +11.25% Attack and Penetration bonus for 10 s, cooldown 15 s | the same after a Tactical skill | left | left |
| VI | +5% Combat Attack Boost | +7% Combat Penetration Boost | left | right |
- The Hunter's passives give no Crit: the rows boost Attack and Penetration. So "Attack + Crit" takes the "attack" nodes (left in T4 and T6), "Attack + Penetration" — the "penetration" ones (right). The choice is read from the small pictures of the source guide (not verified).
- In row T5 the right node gives the same after a Tactical skill. The Core skill is used three times as often (4.3 s against 13 s cooldown), so take the left one (calculated).
- The last point of the 50 goes into Hunter Stat: node 1 (+0.5% Attack Bonus) for crit, node 2 (+1% Penetration Bonus) for penetration (logic).
Inscriptions
Inscriptions are put on in the  Runes menu. The main inscription and two support ones are available at once, the 4th slot unlocks at T4 (Inscription Rating 1000), the 5th at T5 (2500). The main inscription is listed first.
Abyss
| Option | Main | Aux 1 | Aux 2 | Aux 3 | Aux 4 |
|---|---|---|---|---|---|
| Option 1 |  Sin Domain Sin Domain |
 Stasis Field Stasis Field |
 Pause Field Pause Field |
 Mirror Device Mirror Device |
 Winterless Art Winterless Art |
| Option 2 | 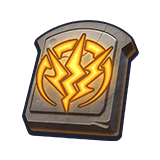 Arcane Domain Arcane Domain |
Stasis Field |
Pause Field |
Mirror Device |
Winterless Art |
In a long fight both domains give about the same: Arcane Domain — 15% constantly, Sin Domain — up to 16% (+48% for 10 s at most once every 30 s) (calculated, full stars). The game's own Balance preset suggests the Arcane Domain. These domains do not wait for a cooldown, so the Stasis and Pause Fields do not hurt them.
League Expedition
| Option | Main | Aux 1 | Aux 2 | Aux 3 | Aux 4 |
|---|---|---|---|---|---|
| Crit |  Vengeance Domain Vengeance Domain |
 Lone Lamp Art Lone Lamp Art |
 Dreamforge Art Dreamforge Art |
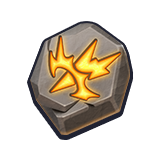 Daybreak Art Daybreak Art |
 Dawnflower Art Dawnflower Art |
| Penetration | Sin Domain |
Stasis Field |
Pause Field |
Mirror Device |
Winterless Art |
The Crit option has no fields that speed up Vengeance, so it triggers at the 30th second of the fight.
Secret Realm
| Option | Main | Aux 1 | Aux 2 | Aux 3 | Aux 4 |
|---|---|---|---|---|---|
| Vengeance at 1 s | Vengeance Domain |
 Quick Field Quick Field |
 Rapid Field Rapid Field |
 Speed Field Speed Field |
Lone Lamp Art |
| Fallback: Vengeance at 21 s | Vengeance Domain |
Quick Field |
Dawnflower Art |
Dreamforge Art |
 Flowfire Art Flowfire Art |
The "Vengeance at 1 s" set triggers at the 1st second by the rule below (calculated; whether the initial cooldown has a lower limit the data does not say). The fallback set is for fights where Vengeance is needed later (21st second). The game's own Extreme Speed preset (Vengeance Domain, Daybreak Art, Rapid Field, Lone Lamp Art, Quick Field) triggers at the 6th second.
When Vengeance Domain triggers
Without fields, Vengeance Domain first triggers at the 30th second of the fight. Fields move this time: percentages add up, and Speed Field subtracts 5 seconds.
| Fields | Triggers at |
|---|---|
| no fields | 30 s |
| Quick Field (−30%) | 21 s |
| Quick Field + Speed Field (−5 s) | 16 s |
| Quick Field + Rapid Field (−50%) | 6 s |
| Quick Field + Rapid Field + Speed Field | 1 s |
| Rapid Field (−50%) + Pause Field (+50%) — they cancel each other out | 30 s |
Specialization: Thermal Shooting
The weapon accumulates heat: while the Hunter stands still, heat grows by 2 per second, up to 100 in the base. Accumulated heat gives +0.1% damage per point. When heat is above 50, every use of a talent skill has a chance to deal an extra hit (damage rate 700), and the higher the heat, the higher the chance. If the bar is full and heat is not spent for 2 seconds, the weapon overheats: for 6 seconds nothing but Basic skills can be used, after which heat resets to zero. There are 20 points in the specialization. Nodes open by the total of points already spent: Thermal Release and Heated Combat — after 10, Thermal Efficiency — after 15, Thermal Burst — after 6, Thermal Intensity — after 5, Rapid Cooldown — after 3, the rest — after the first point.
| Node (max level) | What it does (by level) |
|---|---|
 Thermal Release (3) Thermal Release (3) |
every 20 points of heat drop — an extra hit, damage rate 600/1200/1800 |
 Thermal Intensity (3) Thermal Intensity (3) |
after an extra hit +1 stack of Intensity (up to 5, 15 s); the next extra hit is stronger by 8/15/25% |
 Thermal Efficiency (3) Thermal Efficiency (3) |
after Thermal Release heat gain is 20/30/50% faster for 5 s |
 Rapid Cooldown (3) Rapid Cooldown (3) |
the skill lock after overheating is shorter by 1/2/3 s (from 6) |
 Thermal Enhancement (5) Thermal Enhancement (5) |
the damage bonus per heat point is "additionally increased" by 20/40/60/80/100% (see below) |
 Energy Storage Loading (5) Energy Storage Loading (5) |
maximum heat +10/20/30/40/50 (base 100) |
 Weapon Protection (3) Weapon Protection (3) |
while moving heat drops by 6/10/15 per second (without the node, running does not spend heat) |
 Overload Protection (3) Overload Protection (3) |
the time before overheating after the bar is full is longer by 1/2/3 s (from 2) |
 Heated Combat (3) Heated Combat (3) |
in combat heat grows by another 2/3/5 per second |
 Thermal Burst (2) Thermal Burst (2) |
on entering combat you at once gain 50/90% of the heat bar |
What the data does not say
- The unit of Thermal Enhancement. The game says: the damage bonus per heat point is "additionally increased by 20…100%". It is either +20…100% of the base 0.1% (that is 0.12…0.2% per point) or an addition of 0.2…1% per point.
- Whether the heat reset after overheating counts as a "decrease" for Thermal Release (a hit for every 20 points of decrease).
So the layouts are calculated under twelve sets of assumptions (both unknowns, share of shooting on the move, chance of the extra hit, fight length and others). The main layout of a mode is the robust one: in the worst of those cases it loses the least against the best layout for that case ("maximin"). The base optimum is the best layout under the model's assumptions; it can be noticeably worse if the assumptions do not hold (calculated).
How it is calculated
The model calculates expected damage in 0.25 s steps for all valid layouts (146,491 of 268,391 that sum to 20); the character sheet multiplier is not included. Abyss: running through packs of monsters to the boss (6 targets, 60% of the time on the run, 200 s) and standing at the boss (1 target, 200 s). League Expedition: you stand still (1 target, 300 s). Secret Realm: a tank holds the monsters, you can stand or move (5 targets, 60 s). Durations and numbers of targets are assumptions (calculated).
Layouts by mode
In a cell: the points in the robust layout and, in brackets, in the base optimum.
| Node | Max | League Expedition |
Secret Realm, standing |
Secret Realm, moving |
Abyss, packs and boss |
|---|---|---|---|---|---|
 Thermal Shooting Thermal Shooting |
1 | 1 | 1 | 1 | 1 |
| Thermal Release |
3 | 3 (0) | 3 (0) | 3 | 2 (3) |
| Thermal Intensity |
3 | 3 | 3 | 3 | 3 |
| Thermal Efficiency |
3 | 0 | 0 | 0 | 0 |
| Rapid Cooldown |
3 | 0 (1) | 0 (1) | 0 | 0 |
| Thermal Enhancement |
5 | 5 (4) | 4 (5) | 4 (1) | 5 (3) |
| Energy Storage Loading |
5 | 5 | 5 | 5 | 5 |
| Weapon Protection |
3 | 0 | 0 (1) | 1 (2) | 1 |
| Overload Protection |
3 | 1 (3) | 3 | 0 | 0 |
| Heated Combat |
3 | 1 (3) | 0 | 1 (3) | 1 (2) |
| Thermal Burst |
2 | 1 (0) | 1 | 2 | 2 |
| Total points | 20 | 20 | 20 | 20 |
In the worst case the robust layouts give 81 to 93% of their scenario's optimum (on average 93–97%), the base optima — 62 to 84% (calculated).
- Every mode needs Thermal Intensity 3/3 and Energy Storage Loading 5/5. By the base model Thermal Enhancement is a weak investment (a removed point costs it about 2% or less), but its unit is unknown, so the robust layouts put 3–5 into it.
- Weapon Protection is needed where you run: without it, running does not spend heat and Thermal Release has nothing to count. Where you stand, it is not taken.
- Secret Realm. If you stand almost all the time — the "standing" column, if you move — "moving". The "standing" layout in the moving scenario gives 67% of the optimum, the "moving" layout in the standing scenario — 89% (calculated).
- Abyss. The "packs and boss" column is a compromise between running and standing at the boss.
Magic stones
Stones come in six shapes: round shield, triangle, prism, tower shield, star, moon. The combination bonus turns on when the five slots hold stones of five different shapes from one of the four combinations; only the shape matters.
The only set with the combination Energy Storage Loading - Enhanced (maximum heat +25) is method 1: 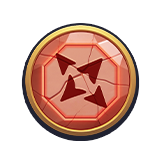 Swiftstrike Round Shield,
 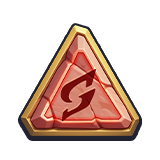 Howler Triangle,
  Strategist Tower Shield,
  Star of Sorrow (any Star will do),
 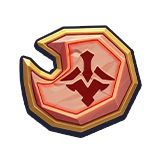 Moon of Tenacity (any Moon will do). Together they give Rapid Strike 165 and Rapid Strike Bonus and Wound Control Bonus of 40% each (calculated from level 3 stones). According to the source guide, take the Star and Moon with the Rapid Strike Mastery potential, or, if you have none, with Damage Control Mastery.
Methods 2 and 3 of the source guide do not turn the combination on. The source guide calls them "activation methods", but they have no Star and no Moon, and each of the four combinations needs both. They are just sets of stats:
- "Pure Rapid Strike": Swiftstrike Round Shield, Howler Triangle, Swiftstrike Prism, Punisher Triangle, Standard Bearer Tower Shield — Rapid Strike 230, bonus 100%.
- "Pure Wound Control": Woundmaster Round Shield and Prism, Strategist and Commander Tower Shields, Howler Triangle — Wound Control 165, bonus 140%.
Rapid Strike boosts the damage of basic attacks and the Core skill (+1% per 30 points), Wound Control — the damage of pet skills. The source guide considers Wound Control stronger, but the data does not show it, and the effect of both attributes in combat has not been checked (not verified).
Potentials (per the source guide): Rapid Strike Mastery, Rapid Strike Amplify, Magic Stone Tempering, Crimson Flare Charge, Same-Origin Potential, Specialization Empowerment (boosts the extra hit of Thermal Shooting and the hit of Thermal Release), Specialization Resonance (Thermal Intensity and the damage bonus from heat). Energy Storage Overload raises the effect of Energy Storage Loading - Enhanced (Hunter only).
Artifacts
Each artifact has nodes for different skills. Cores go into the nodes of the skills you actually hit with.
| Artifact | What to slot |
|---|---|
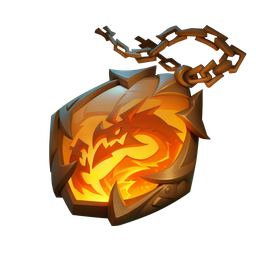 Dragon Soul (Lv. 64, basic skills) Dragon Soul (Lv. 64, basic skills) |
Double Shot: the node fires an additional arrow |
 Compass of the Nine Realms (Lv. 70, core skills) Compass of the Nine Realms (Lv. 70, core skills) |
Moondance: extra damage on hit that grows with the number of debuff types on the target; fill both defensive nodes |
 Tear of the Black Dragon Princess (Lv. 74, tactical skills) Tear of the Black Dragon Princess (Lv. 74, tactical skills) |
The node of your Tactical skill: Gryphon (the lightning of every Gryphon attack hits once more, harder for each debuff type) or Shock Trap (+4 hits); fill both defensive nodes |
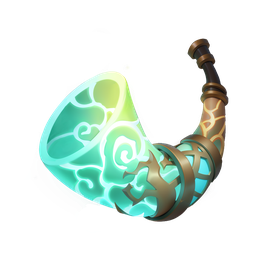 Horn of the Beast Horde (Lv. 80, ultimate) Horn of the Beast Horde (Lv. 80, ultimate) |
Stunning Hunt: a chain explosion on every explosion, harder for each debuff on the target; fill all four defensive nodes |
Small offensive nodes take the Power Nexus (boosts Basic and Core skills) or the Strong Nexus (Tactical and Ultimate). The source guide says "強力威能"; there is no such name in the data, and it is unclear which nexus is meant (not verified). Fill the defensive nodes with the Stable Nexus and Resolute Nexus: they sit in their own nodes and take no room from attack.
Cores
 Dragon Source Alloy - Interference (Dragon Soul) — when any skill is used, 20% chance to apply burn, bleed, slow or paralysis to the target for 5 s and deal an extra hit, stronger for each debuff type.
 Nine Realms Beacon - Suppression (Compass of the Nine Realms) — the Basic and Core skills hit harder on a wounded target: +3% for every 15% of health it has lost.
 Black Dragon Skull - Malice (Tear of the Black Dragon Princess) — when the target has two or more debuffs, there is a chance to cast the Ultimate skill instantly; the debuffs are then removed. The chance is recorded as 18% (not verified).
The fourth core (Horn of the Beast Horde) — by mode:
 Beast Leader - White Lion (Abyss). Every 12 skills cast give +0.8% damage, up to +12.8%.
 Beast Leader - Mammoth (League Expedition). If you stand still for more than 3 s, damage +8%; the bonus disappears when you move.
 Beast Leader - Blood Raven (Secret Realm). Attacks apply a bleed, and the target takes extra damage for every 5 m it moves.
Tying the fourth core to the modes is a recommendation of the source guide; the cores have no mode in the data, but their effects fit it. Numbers are for top-quality cores; the other core numbers (chances, coefficients) are recorded raw in the data (not verified). The set of four artifacts is the same for all modes, only the fourth core changes.
Pet emblems
Each of the three pets has its own slot shape: the first has triangles (△), the second hexagons (⬡), the third diamonds (◇). No more than two identical emblems per pet ("×2"); "Unique" means one copy. Numbers are for top-rank emblems (Crypt Archer, Bone Assassin and Spider only reach rank 4).
There are no "×4" and "×5" layouts from the source guide here: it advises four or five identical emblems (Wind Sprite ×4, Ice Bear ×5, Spider ×5 and others), but the limit in the data is two. They cannot be assembled; why they are in the guide I could not find out.
Level 90 emblems appear on the server in waves: the first from day 83, the second from day 139; there are no level 100 emblems, level 110 comes right after 90. The main rows are for a server older than 139 days, on a younger one take "before day 139". "By the model" is the portal's estimate: points of Attack, Crit, Penetration and Hit Rating are equal, percentages use the portal's weights; the model was taken from a baseline character, not from the Hunter, so a 1–3% difference is not significant (calculated). "Maximum bonus" is simply the maximum of one percentage.
Attack + Crit
| Pet | Emblem 1 | Emblem 2 | Emblem 3 | Emblem 4 | Emblem 5 | Total |
|---|---|---|---|---|---|---|
 First (all Unique), after day 139 First (all Unique), after day 139 |
 Crypt Archer Crypt Archer |
 Frenzied Blackdragon Frenzied Blackdragon |
 Fel Hydra Fel Hydra |
 Rampaging Hydra Rampaging Hydra |
 Nightshade Blackdragon Nightshade Blackdragon |
Attack 2410, Penetration 1750, Damage Bonus 67.8% |
| before day 139 |
Crypt Archer |
 Hellwyrm Hellwyrm |
Frenzied Blackdragon |
Fel Hydra |
Rampaging Hydra |
Attack 2810, Penetration 650, Damage Bonus 63.6% |
 Second, after day 139 Second, after day 139 |
 Fel Thunderlizard (Unique) Fel Thunderlizard (Unique) |
 Rampaging Greendragon (Unique) Rampaging Greendragon (Unique) |
 Nightshade Tyrannosaur (Unique) Nightshade Tyrannosaur (Unique) |
 Phantom Lavagiant ×2 Phantom Lavagiant ×2 |
Crit 1750, Penetration 1100, Attack Bonus 26.6%, Crit Bonus 127.5%,  Evasion 2200 Evasion 2200 |
|
| after day 139, maximum Crit Bonus |
Rampaging Greendragon (Unique) |
 Wind Sprite ×2 Wind Sprite ×2 |
Phantom Lavagiant ×2 |
Penetration 1100, Crit Bonus 184.7%, Evasion 3500 |
||
| before day 139 |
 Bone Assassin (Unique) Bone Assassin (Unique) |
Fel Thunderlizard (Unique) |
Rampaging Greendragon (Unique) |
Wind Sprite ×2 |
Attack 420, Crit 650, Penetration 1100, Attack Bonus 17.9%, Crit Bonus 99.7%, Evasion 1300 |
|
 Third, after day 139 Third, after day 139 |
 Lava Giant ×2 Lava Giant ×2 |
 Phantom Statue ×2 Phantom Statue ×2 |
 Ice Bear Ice Bear |
Attack 3500, Crit 400,  HP Bonus 53.2%, Evasion Bonus 19.1% HP Bonus 53.2%, Evasion Bonus 19.1% |
||
| before day 139 |
Ice Bear ×2 |
Lava Giant ×2 |
 Obsidian Obsidian |
Attack 1700, Crit 800, HP Bonus 28.6%, Evasion Bonus 38.2% |
Attack + Penetration
The first pet (△) takes the same emblems as for crit.
| Pet | Emblem 1 | Emblem 2 | Emblem 3 | Emblem 4 | Emblem 5 | Total |
|---|---|---|---|---|---|---|
| Second, maximum Penetration Bonus (both eras) |
 Frenzied Tyrannosaur (Unique) Frenzied Tyrannosaur (Unique) |
 Firekin ×2 Firekin ×2 |
 Shadow Broodmother ×2 Shadow Broodmother ×2 |
Attack 650, Penetration Bonus 128.3%, Evasion 3500 |
||
| after day 139, by the model |
Frenzied Tyrannosaur (Unique) |
Nightshade Tyrannosaur (Unique) |
Shadow Broodmother ×2 |
Firekin |
Attack 650, Crit 1100, Attack Bonus 15.9%, Penetration Bonus 106.8%, Evasion 2850 |
|
| Third, after day 139 |
 Spider ×2 Spider ×2 |
Phantom Statue ×2 |
Lava Giant |
Attack 2850, Penetration 1320, HP Bonus 42.5%,  Defense Bonus 38.2% Defense Bonus 38.2% |
||
| before day 139 |
Spider ×2 |
 Bio Giant ×2 Bio Giant ×2 |
Lava Giant |
Attack 650, Penetration 2620, HP Bonus 10.7%, Defense Bonus 38.2%, Evasion Bonus 57.2% |
Spider is given for Bounty Quests and sold in the alliance contribution shop. Every rank step burns three copies of the previous rank, so one top-rank emblem takes nine root ones. League Trial emblems are hidden in the data, so I did not use them as replacements.
Pets
The team has three pets. Night Shadow Leopard, which the source guide puts in every layout, is not in the data of our version; another pet takes its place.
- Abyss and League Expedition:
 Meteor (crit) or
 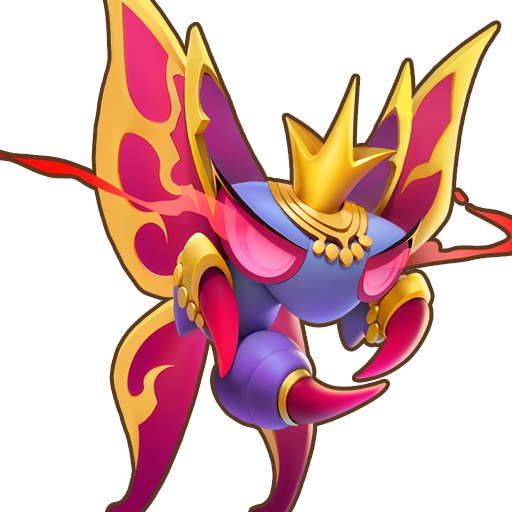 Dancer (penetration),
  Light Howl,
 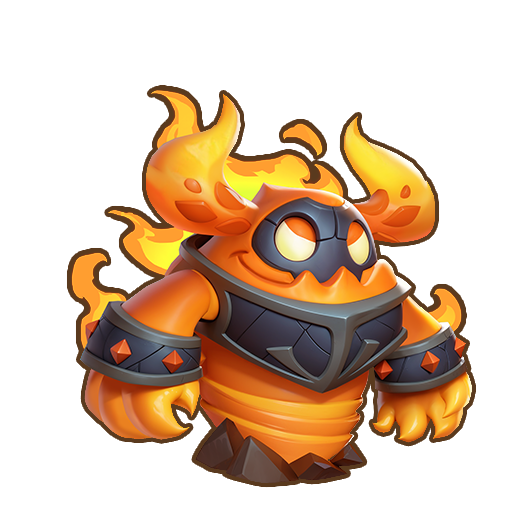 Flame Demon
 - Secret Realm, basic set:
 Soulclaw, Light Howl, Meteor
 - Secret Realm, advanced set: Flame Demon, Light Howl, Meteor or Dancer (logic: instead of the leopard)
Meteor strikes again on a crit, so it is for crit; Dancer stacks Weakness on non-critical hits, so it is for penetration (logic). Light Howl boosts damage and healing for 7 s and is free on a new server for the seven-day event. Soulclaw needs only 0 stars. The source guide's budget replacements are Brightwing, Peachbean and Overlord; by the data Overlord is a defense pet (taunt, self-heal), not a damage buff (replacement not confirmed).
Badges
The sets are the same for all classes; different sets suit crit and penetration.
| Set | Badge 1 | Badge 2 | Badge 3 | Badge 4 | Badge 5 |
|---|---|---|---|---|---|
| Companion Along the Way (crit) |  Gravity Gravity |
 Bladestorm Bladestorm |
 Elven Legacy Elven Legacy |
 Ruling Sword Ruling Sword |
 Twin-tailed Comet Twin-tailed Comet |
| Midnight Run (attack) |  Royalty Royalty |
 Shadow Blades Shadow Blades |
 Troll Empire Troll Empire |
 Twilight Eye Twilight Eye |
 Darktide Surge Darktide Surge |
| Free Rider (attack) |  Meteor Meteor |
 Eternal Vigil Eternal Vigil |
 Blooming Future Blooming Future |
 Earth Ring Earth Ring |
 Destiny Tome Destiny Tome |
| Long Journey (penetration) |  Death Knell Death Knell |
 Broken Barricade Broken Barricade |
 Forest Ranger Forest Ranger |
 Perfect Storm Perfect Storm |
 Blazing Extremity Blazing Extremity |
Set bonuses turn on at levels 3, 6, 9 and 10; the set level equals the lowest badge level in it, so level them evenly. Per the source guide, crit prefers Companion Along the Way, Midnight Run and Free Rider, penetration — Long Journey, Midnight Run and Free Rider (the last two give an Attack bonus).
Oracle
The Oracle opens at level 90. It has five stages: War Oracle, Wisdom Oracle, Future Oracle, Wealth Oracle and Mind Oracle. A prayer in a stage gives permanent and random stats for 168 hours.
How it works. Points accumulate in each stage separately. When the threshold is reached you can pray: the prayer spends its cost, and the bonus lasts 168 hours. Re-rolling the random stats costs 100 points. A stage opens when all the previous ones are open.
| Stage | Threshold, points | Prayer cost |
|---|---|---|
| 1. War Oracle | 25,000 | 8,000 |
| 2. Wisdom Oracle | 25,000 | 8,000 |
| 3. Future Oracle | 40,000 | 8,000 |
| 4. Wealth Oracle | 40,000 | 8,000 |
| 5. Mind Oracle | 50,000 | 10,000 |
What earns points (the same for every stage):
| Material | Points each |
|---|---|
 Statue Offerings Statue Offerings |
100 (from the Inscription Prayer and the Badge Lottery) |
 Inscription Core Inscription Core |
2 (from wild map exploration, Hard Raid floors and the resource shop) |
 Inscription Essence Inscription Essence |
2 (from converting surplus inscription shards) |
 Moonlight Cloth Moonlight Cloth |
5 |
 Demon Cloth Demon Cloth |
10 |
 Frostwoven Cloth Frostwoven Cloth |
20 |
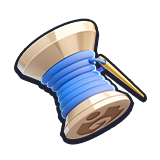 Silk Thread Silk Thread |
1 |
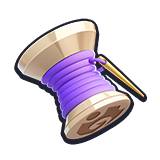 Magic Pattern Thread Magic Pattern Thread |
10 |
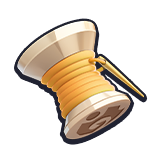 Rune Thread Rune Thread |
100 |
What it gives. Permanent and random stats (Attack, HP, Crit, Penetration, Evasion and others); the values depend on the World Level of the server, not on your character level, and grow with it.
Towards level 100
- At 100 items of level 100–108 and level 10 gems become available; the next ring step counts only level 10 gems and up, so change it together with your gems.
- There is no set for Moondance among the level 100 items: Outland Echo boosts Piercing Arrow and Splitshot (+120%), Blood Paladin — Shock Trap and Frost Trap (+110%). At 110 Eternal Imprisonment repeats Dark Gate (+120% to Moondance and Vengeful Moonblade), and Sunshard Coalition repeats Death Wish. What is better at 100–109 depends on whether you stay on Moondance: the bow and gauntlet effects are tied to its node (logic). I did not look at the weapons and gloves of level 100–106.
- Inscription Rating 7000 means T6 and the T6 passive row. If you have not reached it yet, start now.
(calculated) — computed from game data, not tested in combat. (not verified) and ❔ — the rule lives on the server or the data cannot confirm it. (logic) — a conclusion from reasoning, not from a table.
Not tested: actual damage in combat, the unit of Thermal Enhancement and the heat reset, whether Rapid Strike and Wound Control work, which special effects roll on which slot, which Tactical skill is better, what best replaces Night Shadow Leopard, how many Statue Offerings the lottery gives.